AftabRad Revit Add-in -> How to create “Daylit”, “partially
Daylit”, “non-Daylit”, “excessive Daylight” zones
This tutorial shows how to categorize spaces based on the daylight
availability in the interiors. We can
use such analysis to do our lighting design concept or define different
lighting control zones.
For example, in a non-daylit area, the electrical lighting fixture
should be switched on whenever it is occupied. So, its lighting design concept
should be different from a daylit or partially-daylit space
that could be adequately lit by daylight during day times. Regarding the
part of interiors categorized as excessive Daylight that can be faced with too
much sunlight and consequently have problems
with glare,
it is recommended not to place any working desks there whenever designing the
interior layout.
Therefore, by doing Daylight Autonomy and Annual Sunlight Exposure
calculations for the interior spaces, and by considering what is recommended in
the below, we can define different areas of
interior
spaces as Daylit, excessive Daylight, partially-Daylit, and non-Daylit.
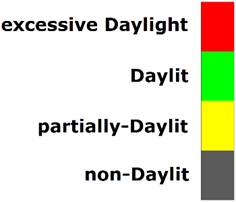
DA300 ≥ 50%: Daylit
DA300 ≥ 50% and ASE1000 > 250h: excessive Daylight
DA150 ≥ 50% and DA300 < 50%: partially-Daylit
DA150 < 50%: non-Daylit
To find fully, or partially daylit areas, or parts of spaces with
insufficiently daylight that can be used to categorize space in
regard to daylight access, we use the method that is recommended by
Christoph
Reinhart and his colleagues in this paper (Reinhart, C., Rakha, T. and
Weissman, D., 2014. Predicting the daylit area—a comparison of students assessments and simulations at eleven schools of
architecture.
Leukos, 10(4), pp.193-206).
Anyway, in
order to do categorize an interior space as Daylit, partially Daylit, non-Daylit,
or withexcessive
Daylight, we should do the following steps.
1- With the help
of the tutorial in this link https://www.aftabsoft.net/AftabRadTutorial/DA_PtsCalculation_rcontrib.htm,
we should do both Daylight Autonomy of minimum 300 lux (DA300) and
Daylight Autonomy of minimum 150 lux (DA150) for the selected
space.
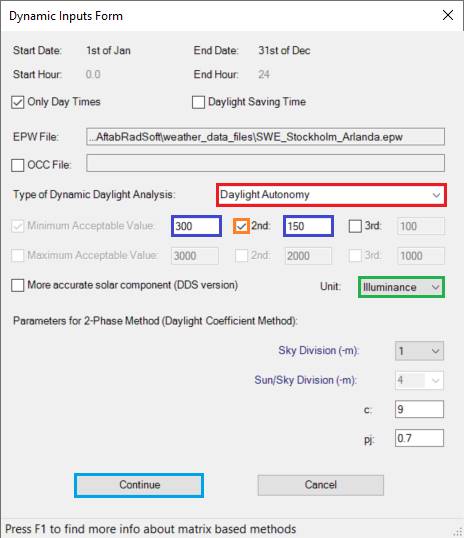
To do so, we should modify the parameters in the “Dynamic Inputs Form”
page as they are shown in the below image.
2- Then please follow
this link https://www.aftabsoft.net/AftabRadTutorial/ASE_PtsCalculation_rcontrib.htm
in order to do Annual Sunlight Exposure (ASE1000) analysis.
3- When all the needed
calculations (DA300, DA150, and ASE1000) that
are mentioned above are finished, please follow one the below methods to open
the Daylit Zoning tool
-
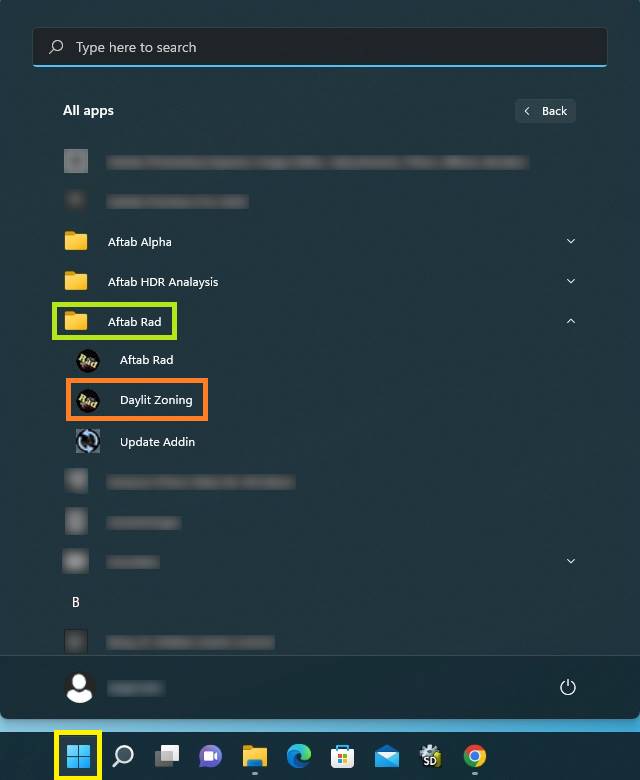
Go to Start in windows, and then in the
Aftab Rad folder, press the “Daylit Zoning” button
-
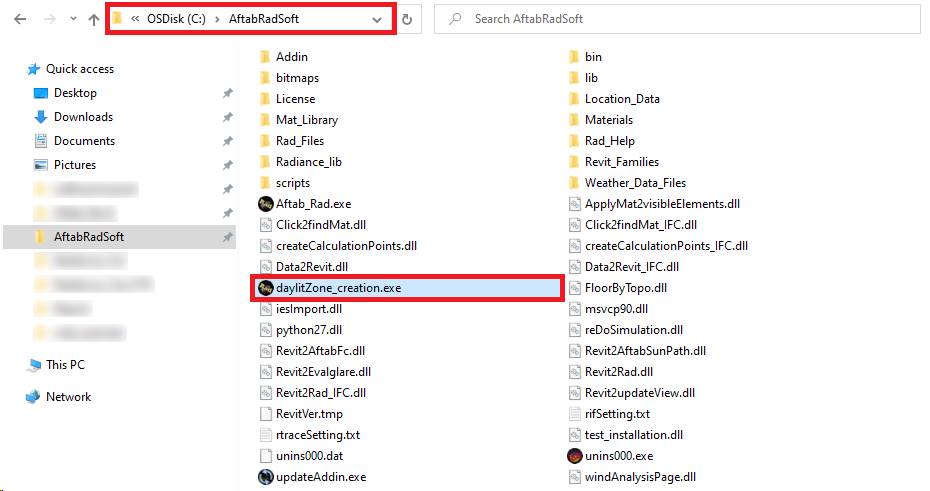
Or simply go to C:\AftabRadSoft, and run
the daylitZone_creation.exe file
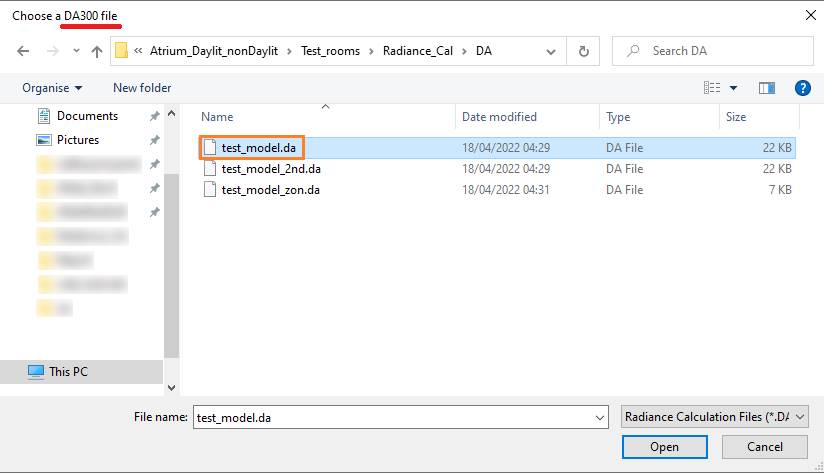
4- When opening
the Daylit Zoning tool, at first it asks to open a *.da
file that should be related to the already DA300 calculation file.
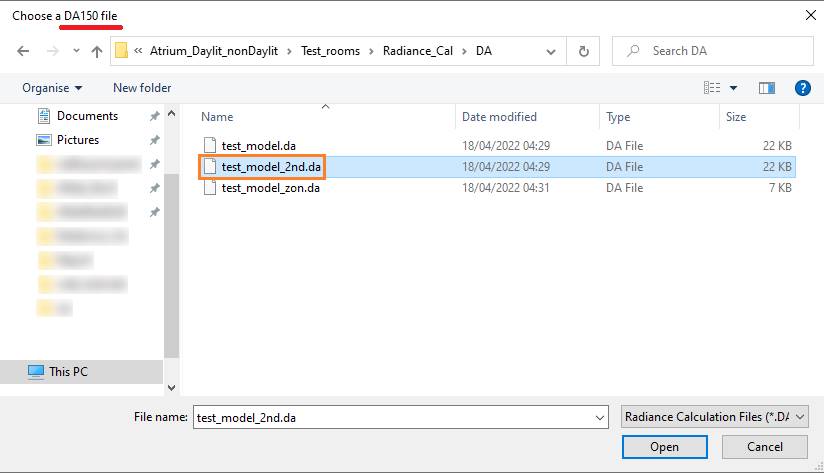
Secondly, we should select another *.da file
that should be based on DA150 calculation file.
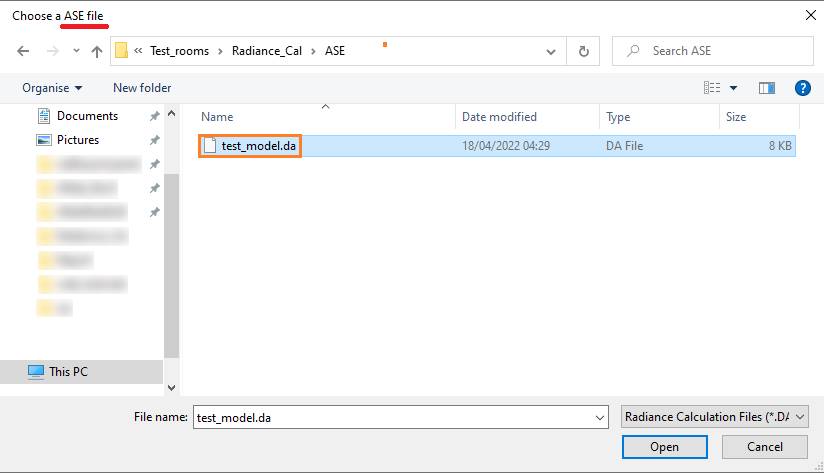
And finally we need to open another *.da file
that is related to an already calculated ASE1000 file.
Then, after opening all three files, it automatically create a new file ended
with *_zon.da and save it in the same folder as
where the DA300 calculation file is saved.
5- Now, it is time to import the *_zon.da file into
Revit. Therefore, the next step is to press the importToRevit Button.

6- In the Data2Revit page,
we need to press the Open Dat File button to open the right *_zon.da file.
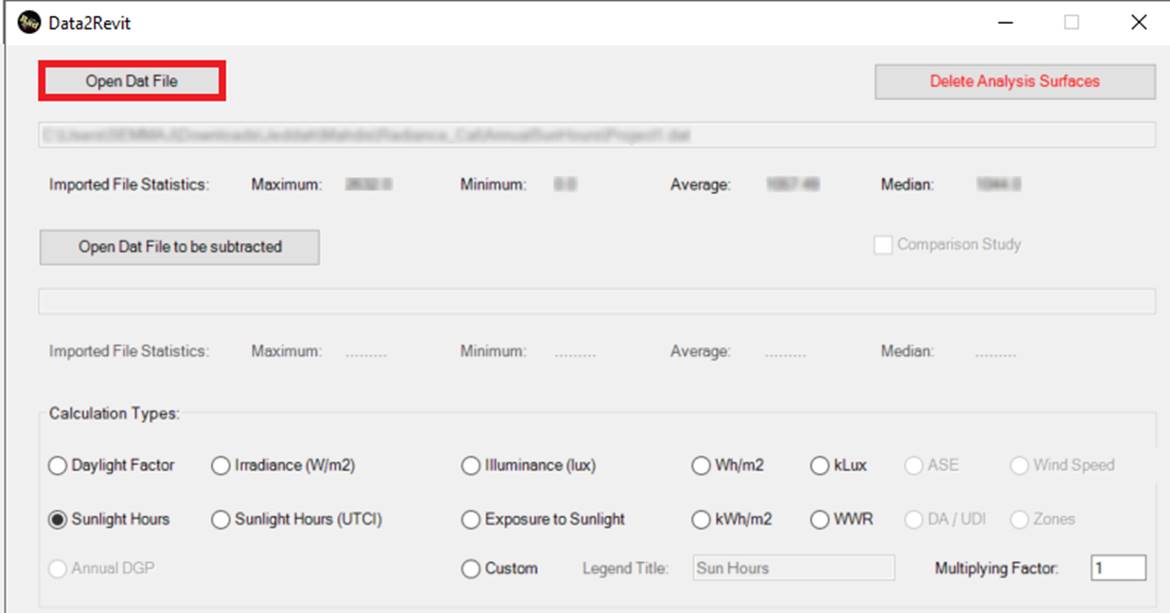
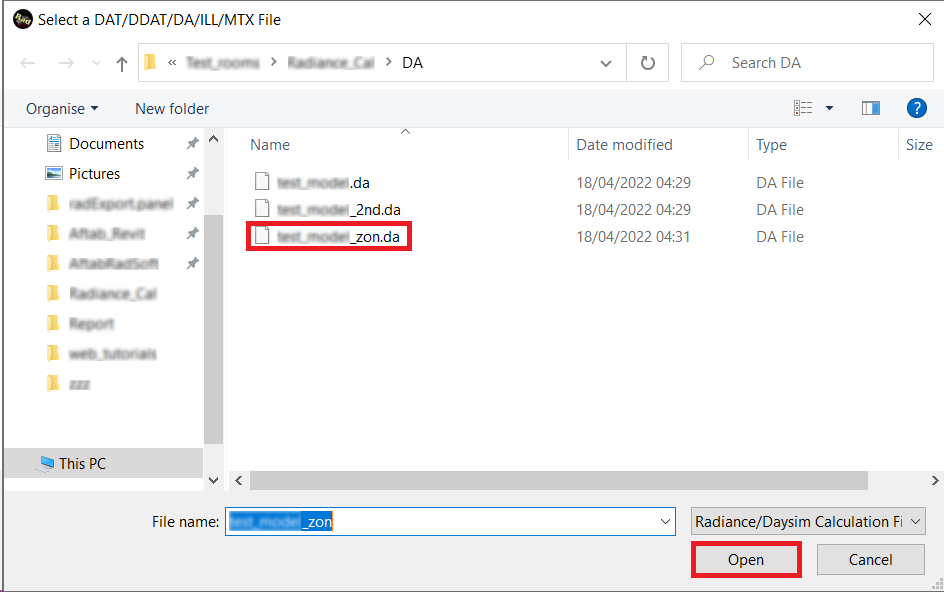
7- When pressing
the Open Dat File button, the below page will be opened. Then
we need to go where the *.da files saved.
When choosing the right da file, press
the Open button.
8- It should automatically select the Zones under
the Calculation Type, otherwise, please select the Zones radiobutton and
then press
the Import button.
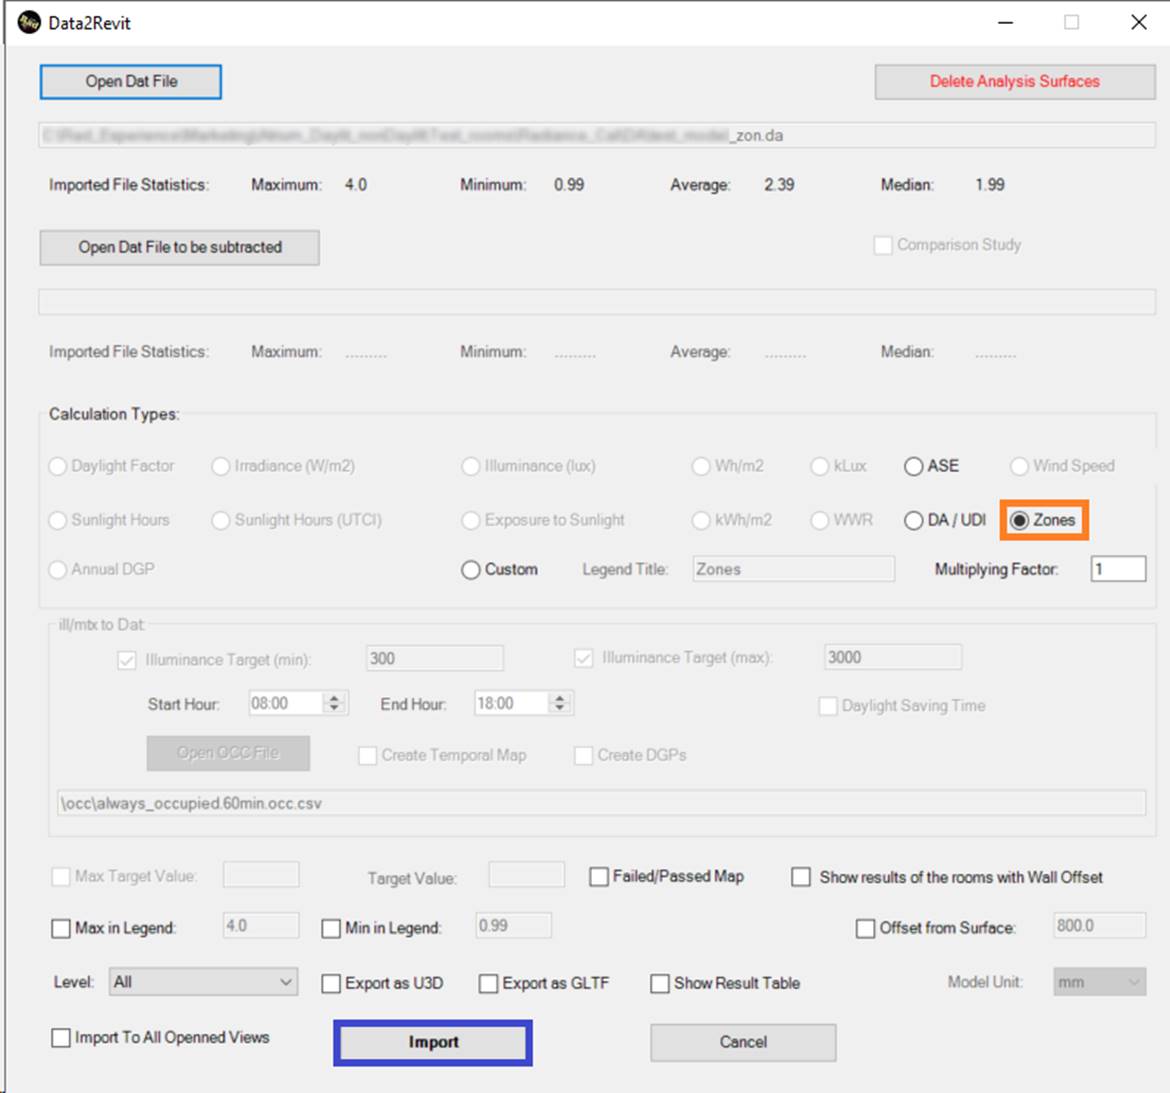
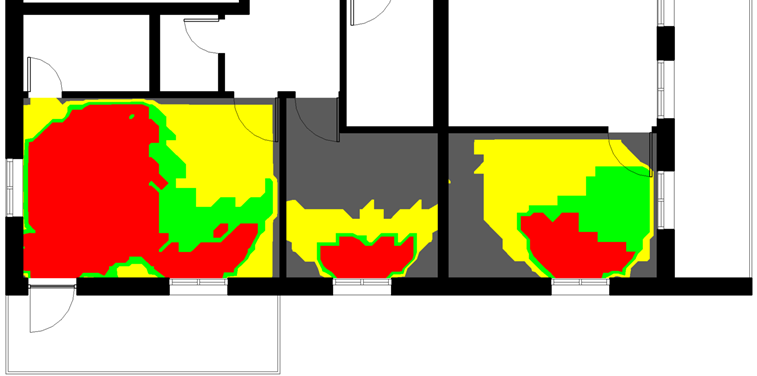
9- Finally, you
should see the results similar to the below image.