AftabRad
Revit Add-in -> Doing DGP (Daylight Glare Probability) Analysis for a
Specific View
Here, this tutorial is about showing how to do different types of glare analyses (for example DGP).
To do so, at first, we need to select one of the Revit views existing in the model. The next step is to adjust its exported Radiance view parameter to be shown right in Radiance.
Then, by exporting the model and the selected view to Radiance, an HDR photo is created. Finally, by opening the Glare Analysis Page, we can do different types of glare analyses for that HDR image.
In Glare Analysis Page, it uses “evalglare†that is a Radiance based tool being developed by Jan Wienold at the Fraunhofer Institute in Germany, or “findglare†that is a Radiance command.
Therefore, this page is an interface to detect glare sources and calculate glare indexes such as Daylight Glare Probability (DGP), Daylight Glare Index (DGI), Unified Glare Index (UGI), Unified Glare Rating (UGR), etc. for each Radiance based HDR image.
Therefore, to do a DGP or other types of glare analyses for a selected Revit view, we should do the following steps:
1- Press ExportToRadiance button in the AftabRad Add-in

2- In the Revit2Radiance page, firstly we need to choose one
of the following types of skies under the Type of Sky/Analysis dropdown list:
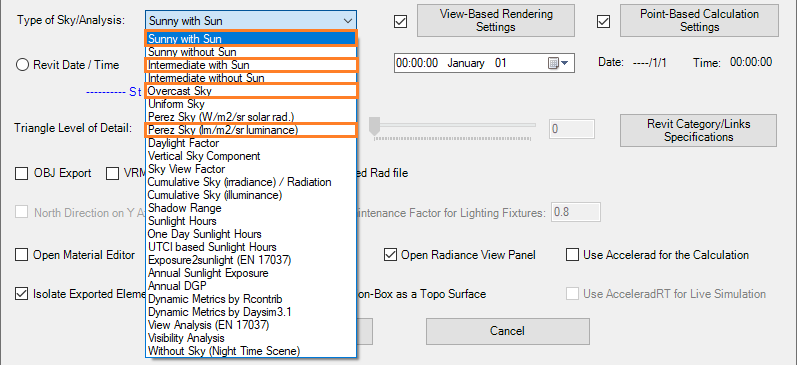
Sunny with Sun:
By selecting this option in the Type of Sky/Analysis drop-down
list, it creates a sunny sky distribution that is corresponding to a standard
CIE clear day
and generates a source description of the sun. In this option, such a
sun and sky luminance distribution is based on considering the selected date
and
time that is defined either from what is specified in the Revit Sun
Settings.. current view or with using Custom Date/Time in the add-in
(see the below
image). Moreover, the location and orientation of the place are also
important. Regarding location and north orientation, this add-in extracts such
data
from the Revit model and just presents it in the add-in. So, we cannot
adjust it in the add/in, but this option uses such data when defining the sun
and sky
luminance distribution.


![]()
Intermediate with Sun:
By selecting this option in the Type of Sky/Analysis drop-down
list, it creates a sky distribution that is corresponding to a standard CIE
intermediate sky
and generates
a source description of the sun. Same as Sunny with Sun, in this option,
the sun and sky luminance distribution is based on considering
the
selected date and time that is explained in the above. Moreover, regarding
location and north orientation, this option works exactly the same as the
Sunny
with Sun option.
Overcast Sky:
By selecting this option in the Type of Sky/Analysis drop-down list, the
sky distribution will correspond to a standard CIE overcast day. Since it is
based
on the CIE
overcast sky, it is free from orientation. Moreover, although its distribution
is independent from the location, and selected date and
time, they
affect their luminance intensity.
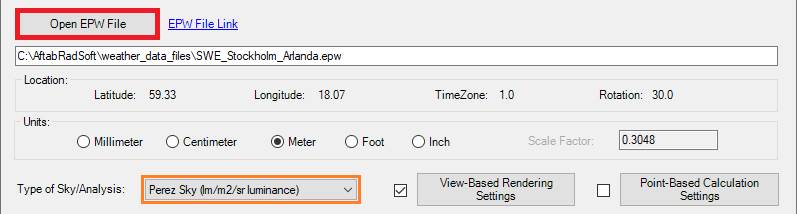
Perez Sky(lm/m2/sr):
In this option, the diffuse angular distribution of the sky is calculated
based on the Perez et al. sky luminance distribution model. It is created by
using
direct
normal or diffuse horizontal irradiance or illuminance value that we can find
it from the weather data file for each hour during the whole year.
The output in
this option is luminance in lm/m2/sr.
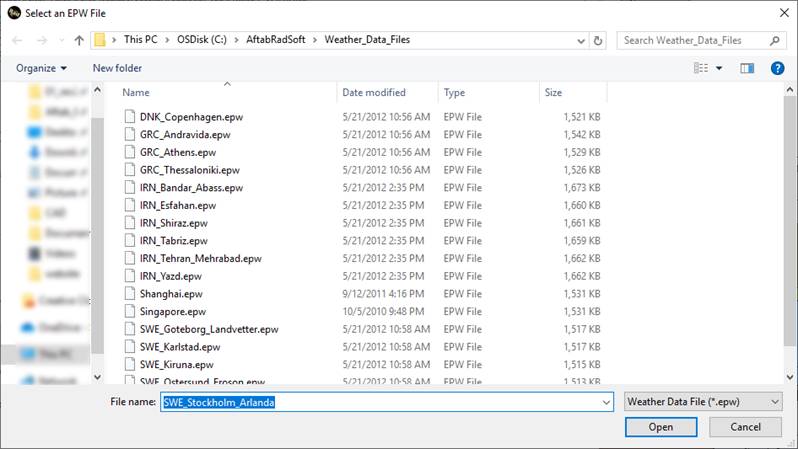
Therefore, in this option, we need to include an epw file in the
calculation. So, we need to import an epw file by pressing the Open EPW File
button and
open a relevant file.
One of the most common way to find
different EPW file for different cities in the world is to download the weather
data file of around 2000 cities in the
world from https://energyplus.net/weather website.
The other free option to find an appropriate EPW file for your project is to use this link: http://climate.onebuilding.org/
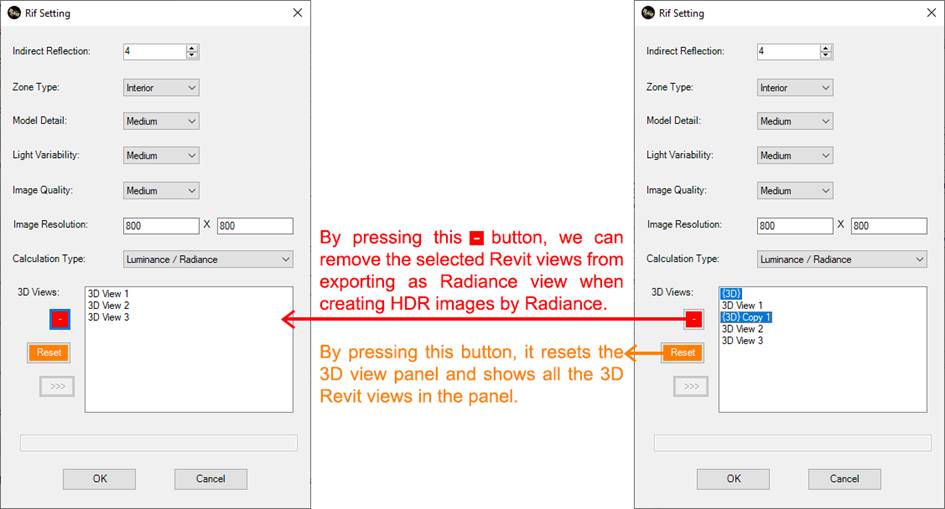
3-
Activate the checkbox next to the Rif Settings button, then press
the Rif Settings button to open the Rif Setting page to define:

i.
The 3D views that you want to include when exporting the model into
Radiance. (Here, we will define on which views we want to do the export to
Radiance.
ii.
Zone Type (in this calculation,
choose Interior)
iii.
Image Quality, Model Detail,
and Light Variability
iv.
Image Resolution (it is recommended
to not have higher than 1000 when doing a glare analysis is the only
goal to create HDR images)
v.
Calculation Type (luminance/radiance
or illuminance/irradiance) (for this calculation it should be luminance/radiance)
vi.
Indirect Reflection (the higher,
the better, but it takes longer and longer)
4-
To create a good view that satisfies our expectations regarding the
viewpoint, view direction, horizontal and vertical field (in degree) or width
of the view, we can activate the Open Radiance View Panel checkbox.
5-
Be sure that you checked the checkbox next to the Rif Settings
button, and press the Do Export2Radiance button.

6-
If you checked the Open Radiance View Panel checkbox, the Radiance
View Panel will be opened.
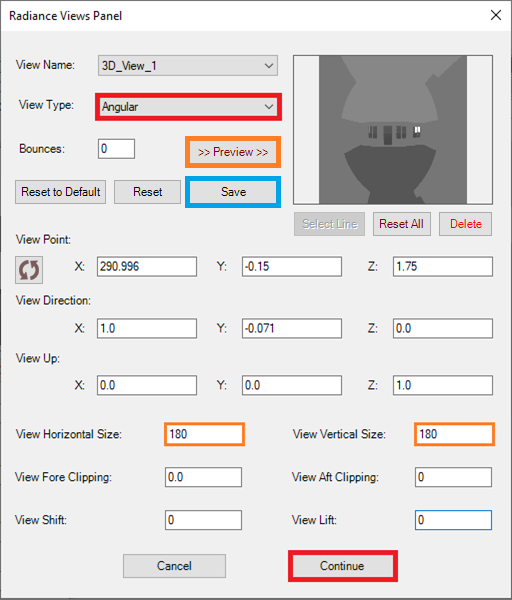
In this
page, we can change all different Radiance parameters of the selected view, and
preview the image by pressing >> Preview
>> button.
To do a
glare analysis, it is recommended to create fish-eye based images. Therefore,
it is better to choose one of the Angular, Hemispherical or
Planisphere in the View Type dropdown list. It should be
together with assigning 180° to both the View Horizontal Size and View
Vertical Size.
“A hemispherical fisheye is a projection of the hemisphere onto a circle. The maximum view angle for this type is 180 degrees. An angular fisheye view is defined such that distance from the center of the image is proportional to the angle from the central view direction. An angular fisheye can display a full 360 degrees. A planisphere fisheye view maintains angular relationships between lines and is commonly used for sun path analysis. This is more commonly known as a "stereographic projection," but we avoid the term here so as not to confuse it with a stereoscopic pair. A planisphere fisheye can display up to (but not including) 360 degrees, although distortion becomes extreme as this limit is approached.“ (https://floyd.lbl.gov/radiance/man_html/rpict.1.html)
As soon as
we are satisfied with the image, we can save that view parameters by pressing
the Save button and then we can press the Continue button to
continue the
export to Radiance procedure.
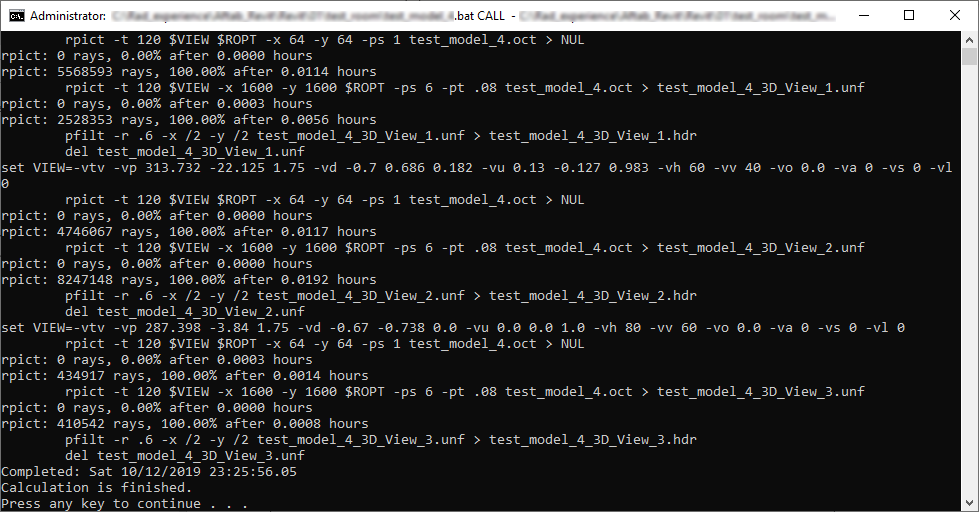
7-
After pressing the Continue button, the calculation process will be
started. Here it is worth to mention that, since it does its calculation for
each hour in the selected period, it can take from a few minutes to few hours.
So, please
prepare for a long calculation time.
8-
Now, it is time to make the image-based analysis. Therefore, the next step
is to press the OpenEvalGlareGUI Button.

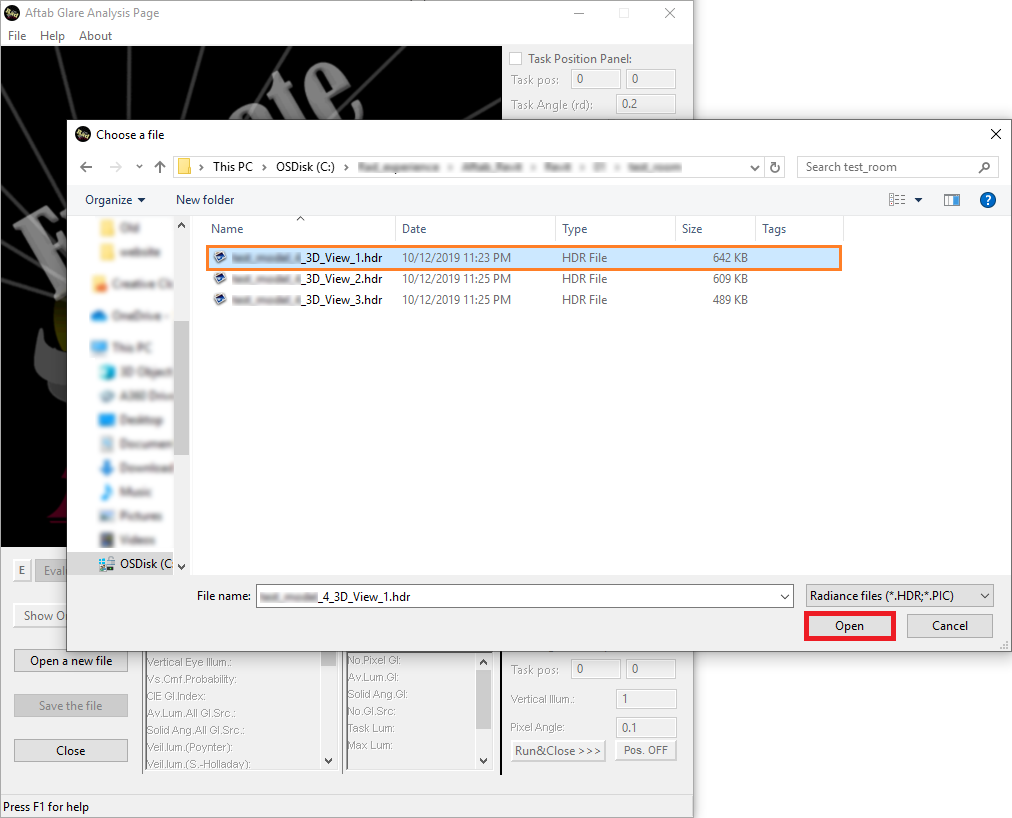
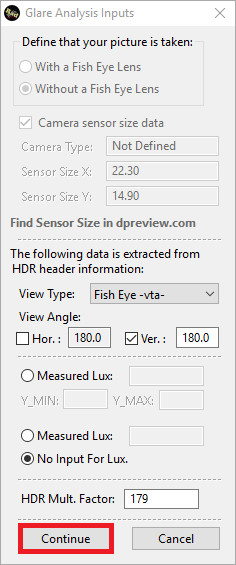
9-
Press the Continue button on the Glare Analysis Inputs page.
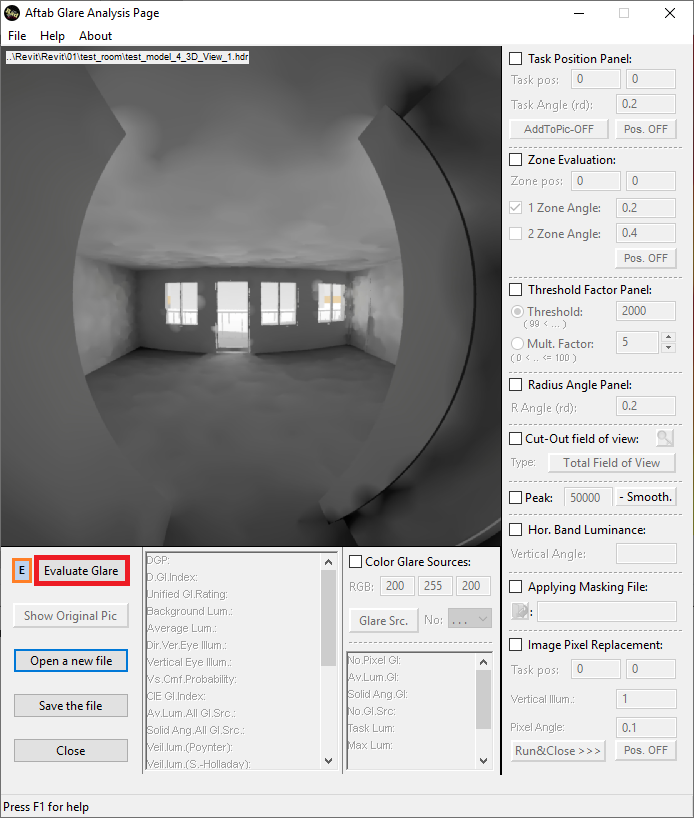
10-
In the Aftab Glare Analysis Page, choose E and the
press Evaluate Glare.
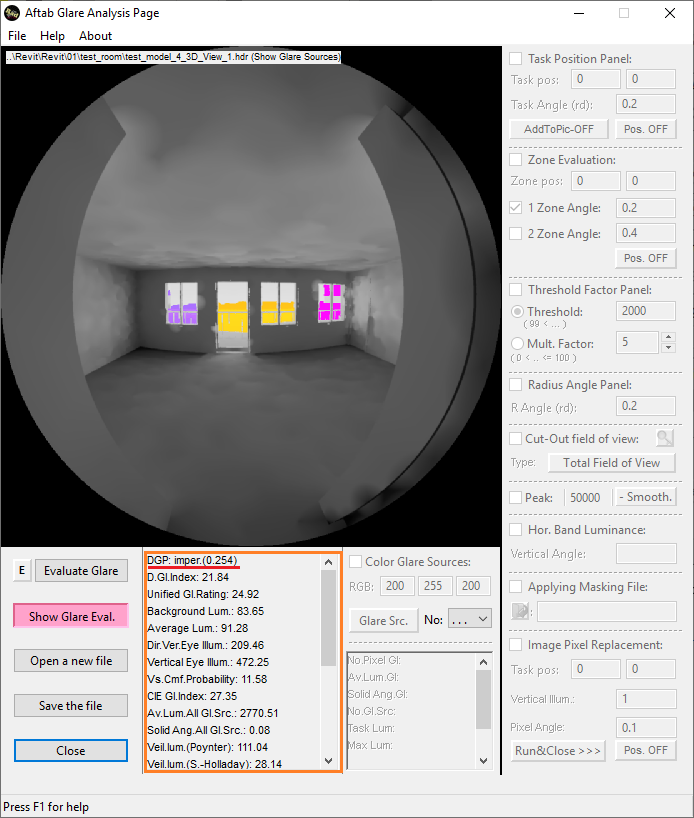
11-
Here, after finishing the calculation by evalglare program, here is
what we can see in this interface.
12-
To know more about different functions of Aftab Glare Analysis
Page, you can take a look at this pdf file or this link.