AftabRad Revit Add-in -> Export To Radiance -> Type of Sky/Analysis: Exposure2sunlight
(EN 17037)
In the Daylight
in Building EN-17037 European Standard, there are four different criteria that
are discussed and asked to fulfill. One of these four is Exposure to
sunlight.
In the 5.3.2
Criteria for exposure to sunlight and A.4 Recommendation for exposure to
sunlight in the standard document, it mentions that:
The
recommendation is that a space should receive possible sunlight for a duration
according to the Table A.6 (supposed to be cloudless) on a selected date
between February 1st and March 21st.

Therefore, to
do the analysis we should do the following steps.
1- To find the
exterior windows, this plugin uses two rules. The first rule to define any
doors, windows, or curtain walls as exterior fenestration, is to find anyone
that is only connected to one Revit room.
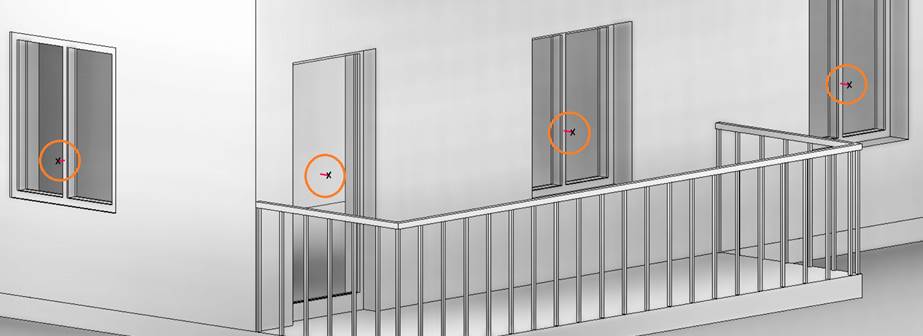
However, if there are any doors or windows that are placed in the
exterior walls, but are connected to two rooms (for
example in the below image, you can see that the balconies are defined as
rooms), then we should use the second rule.
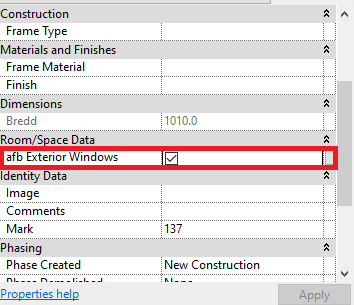
In the second rule, any fenestration that has its afb
exterior Windows parameter
checked is defined as exterior doors, windows, or curtain walls. Whenever you
open any of the Aftabrad commands, this parameter is added to all fenestrations.
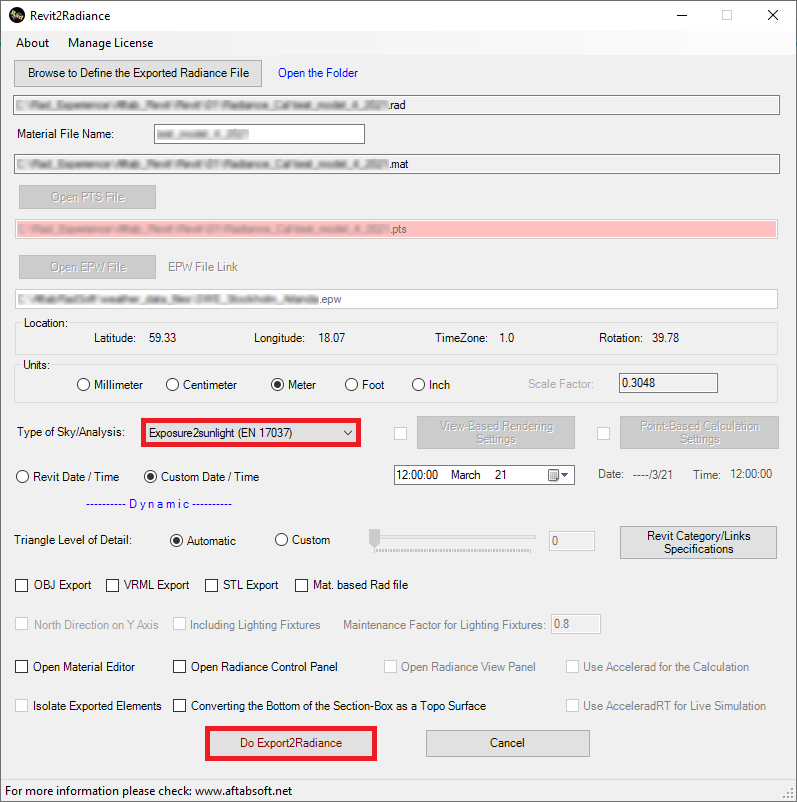
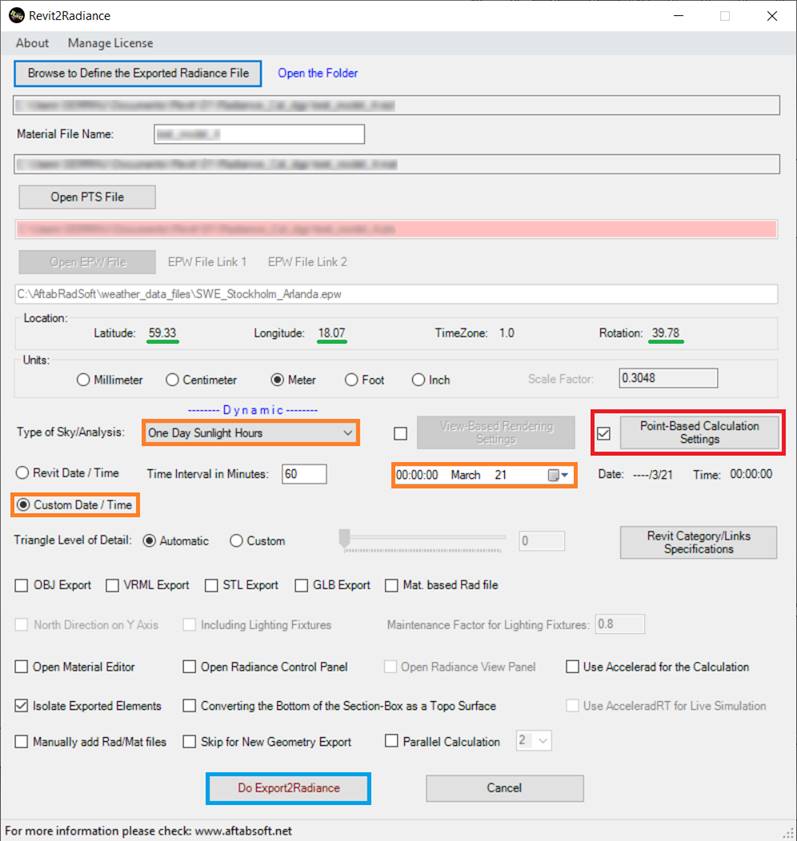
2- Press ExportToRadiance
button in the AftabRad Add-in

3- Select Export2sunlight
(EN 17037) in the Type of Sky/Analysis
4- Press Do Export2Radiance button
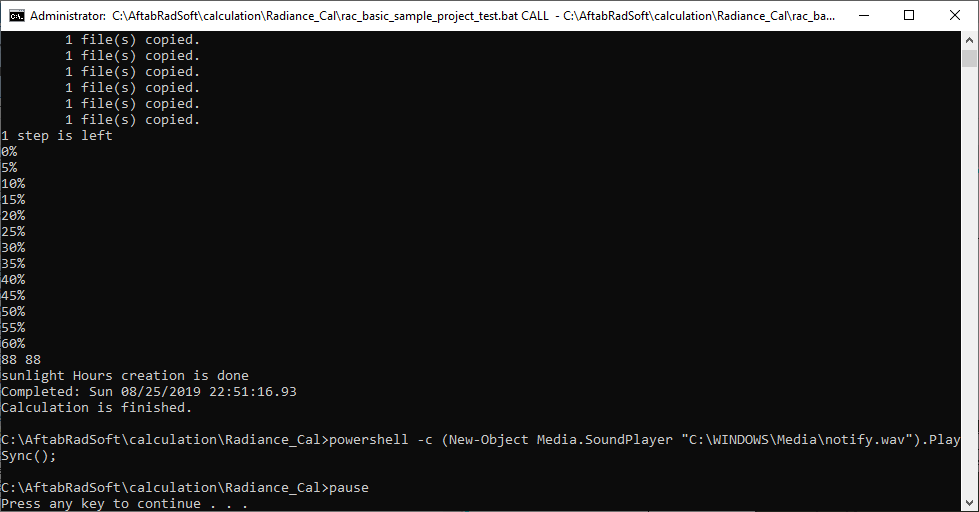
5- Then, you need to wait until the calculation is finished.
6- Now, it is time to import the calculation data into Revit. Therefore, the
next step is to press the importToRevit Button.

7- In the Data2Revit page, if the Import button is enabled,
then the full name of the dat file that is shown in the textbox below
the Open Dat File button is porbably right.
Otherwise, you need to press the Open Dat File
button, choose the right dat file.
8- Select the Exposure to Sunlight under the Calculation Type.

9- Press Import.
Troubleshooting:
If you see some windows are missing,
you can do the following steps instead for this missing parts:
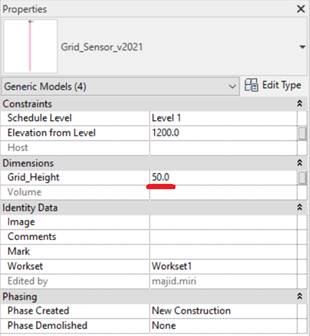
1- Start to place
the sensor-girds family and place it in a relevant height on each missing
windows glasses and change its height to a minimum value like 5mm
(to know more about how to place sensor grids
you can check this link: https://www.aftabsoft.net/AftabRadTutorial/CreateCalculationPointsFile.htm)
2- Then, by activating the By Sensor Elements in Revit checkbox on the Calculation
Points Creation page, pressing the OK button, we can create daylight
calculation points on the right positions on the windows surfaces.

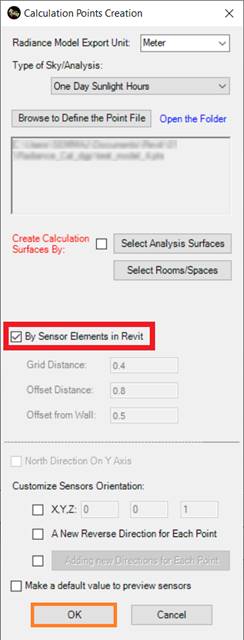
3- Next step is to activate the Point-Based Calculation Settings and
select the One Day Sunlight Hours, and finally we should press the Do
Export2Radiance button.
4- Now, it is time to import the calculation data into Revit. Therefore, the
next step is to press the importToRevit Button.
5- In the Data2Revit page, if the Import button is enabled,
then the full name of the dat file that is shown in the textbox below
the Open Dat File button is porbably right.
Otherwise, you need to press the Open Dat File
button, choose the right dat file.
6- Select the Sunlight Hours under the Calculation Type.
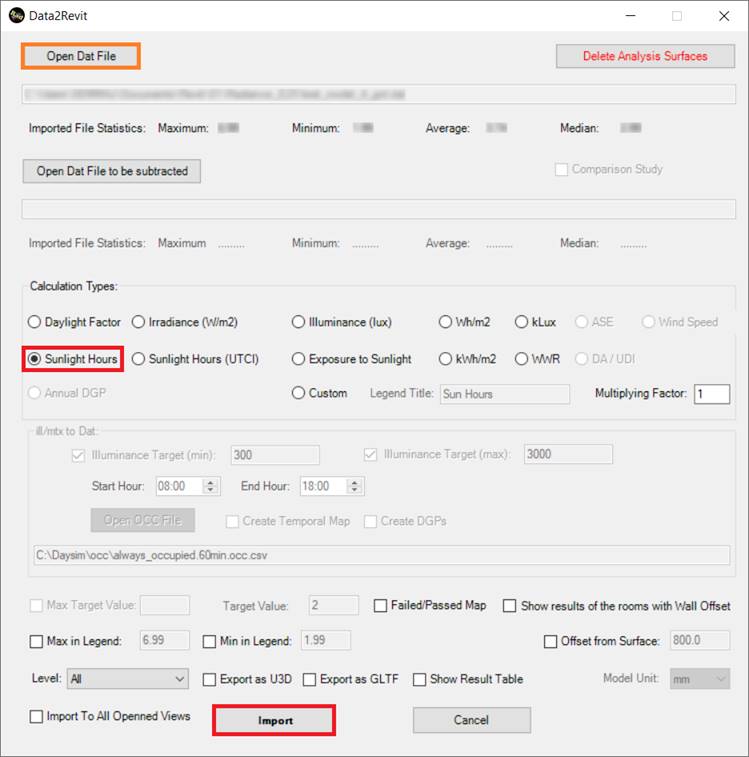
7- Press Import.