AftabRad
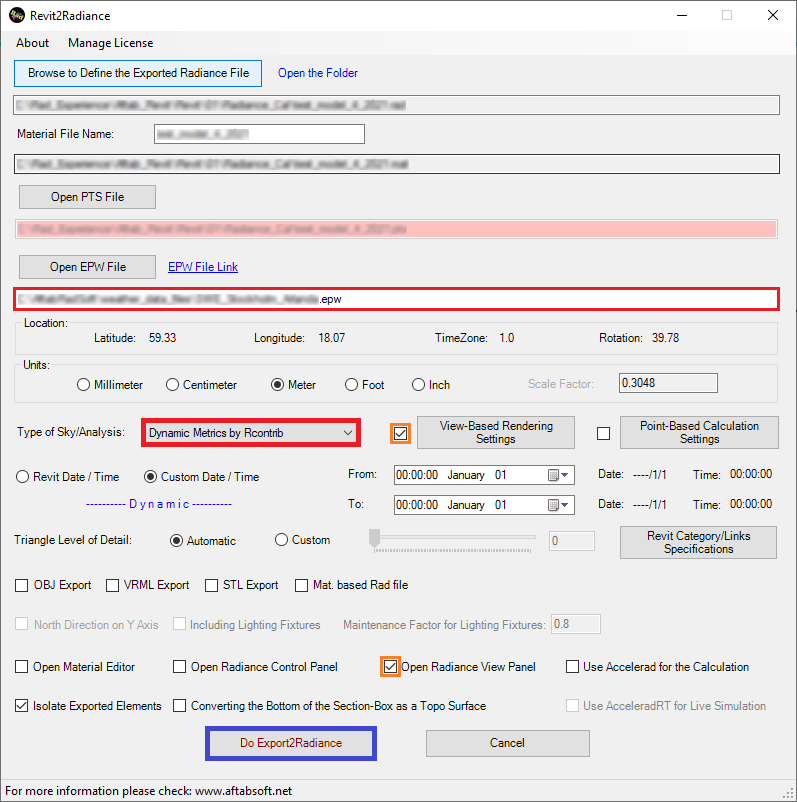
Revit Add-in -> Export To Radiance -> Type of Sky/Analysis: Dynamic
Metrics by Rcontrib
This tutorial shows how to calculate different types of Dynamic Daylight Metrics like Daylight Autonomy for a selected Revit view. This part of add-in uses the rcontrib program inside the Radiance.
Moreover, since it is going to do one of the Dynamic Daylight metrics, such an analysis is based on the climate of the place. Therefore, to calculate such metrics, we need to import the weather data file of the place too.
Anyway, as an example to do a Daylight Autonomy analysis for one of the existing Revit views in the model, we should do the following steps.
1- Press ExportToRadiance button in the AftabRad Add-in

2- Select Dynamic Metrics by Rcontrib in the Type of Sky/Analysis
3- When choosing the Dynamic Metrics by Rcontrib as the type of analysis, we need to define the calculation period. By default, by choosing this type of analysis, the calculation duration is automatically changed to a period from 1st of January to the end of December.
However, we can change the calculation duration to anything else if we want to do this type of analysis for different periods in a year.
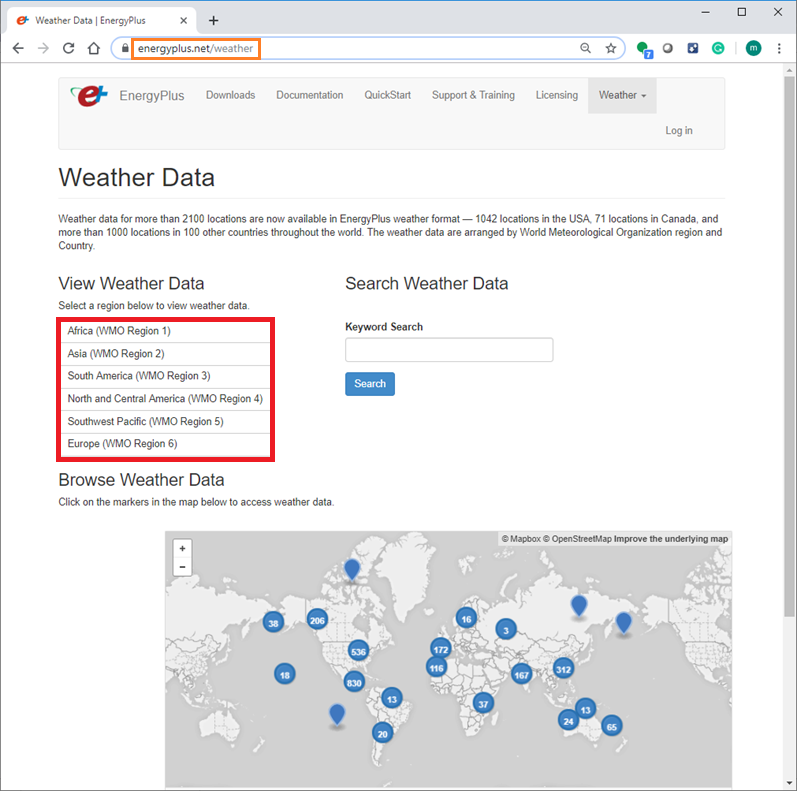
1- Since dynamic analyses are usually based on including typical weather conditions of the place, we need to import EPW (Energy Plus Weather Data File).
One of the most common way to find different EPW file for different cities in the world is to download the weather data file of around 2000 cities in the world from https://energyplus.net/weather website.
The other free option to find an appropriate EPW file for your project is to use this link: http://climate.onebuilding.org/
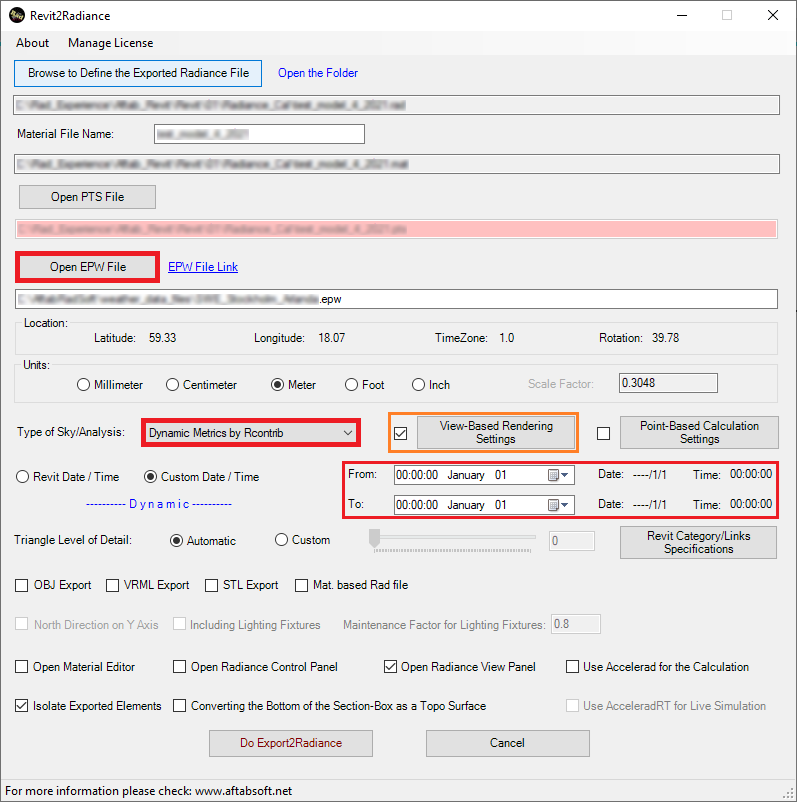
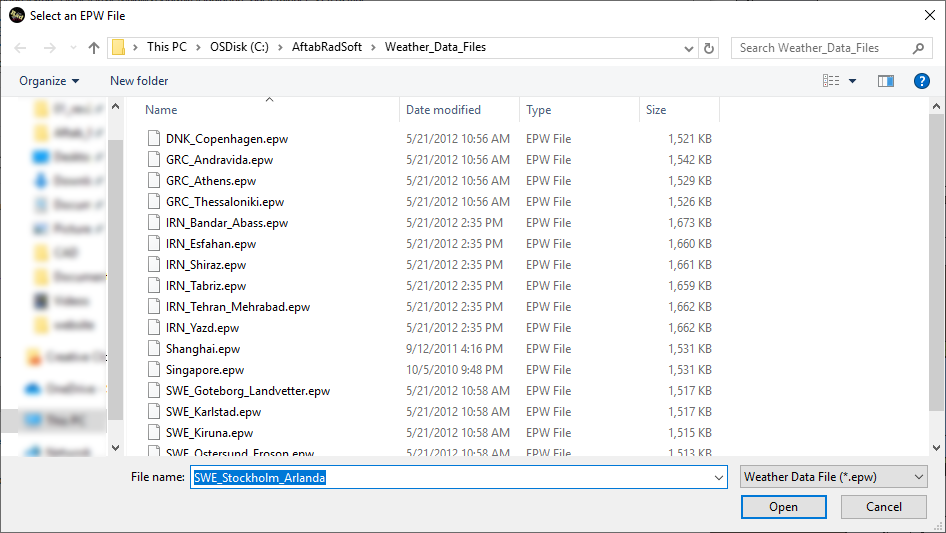
4- Press the Open EPW File button and import an EPW file that is relevant for the location of your model.
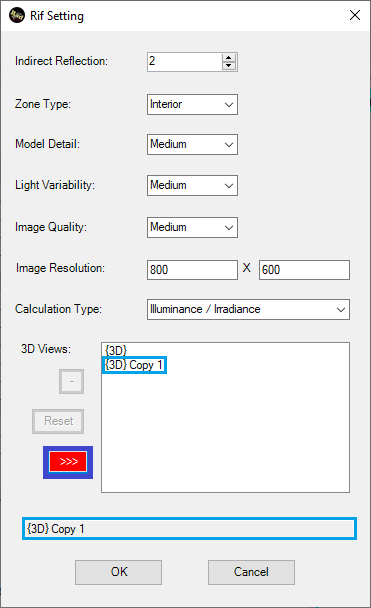
5-
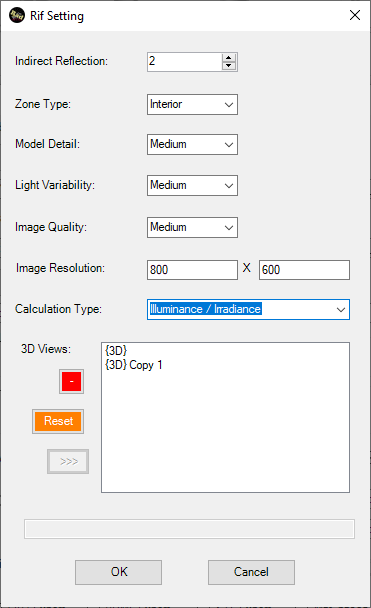
Press Rif Settings button to open the Rif Setting page to
define
a.
The 3D views that you want to include when export the model into Radiance.
(Here, we will define on which views we want to do the export to Radiance.
However later we will come back to this
page and asked to choose only one view to do the Dynamic Metrics by
Rcontrib study)
b.
Image Quality, Model Detail,
and Light Variability
c.
Image Resolution
d.
Calculation Type (luminance/radiance or illuminance/irradiance)
(for this calculation it should be illuminance/irradiance)
e.
Indirect Reflection (in this
analysis it should be zero)
6-
To create a good view that satisfies our expectations regarding the
viewpoint, view direction, horizontal and vertical field (in degree) or width
of the view, we can activate the Open Radiance View Panel checkbox.
7-
Be sure that you checked the checkbox next to the Rif Settings
button, and press the Do Export2Radiance button.
8-
After pressing the Do Export2Radiance button, we need to specify
only one view to continue the Dynamic Metrics by Rcontrib image-based analysis.
So the Rif
Setting page appears again, but this time we just have one choice of view. By
pressing >>> button we can choose the selected view in the 3D Views
panels as the main view to continue the calculation.
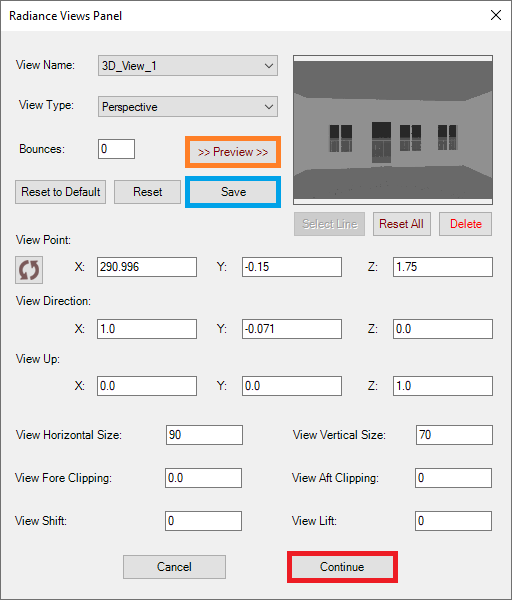
9-
If you checked the Open Radiance View Panel checkbox, the Radiance
View Panel will be opened.
In this
page, we can change all different Radiance parameters of the selected view, and
preview the image by pressing >> Preview
>> button. As soon as we
are satisfied with the image,
we can save
that view parameters by pressing the Save button and then we can press Continue
to continue the export to Radiance procedure.
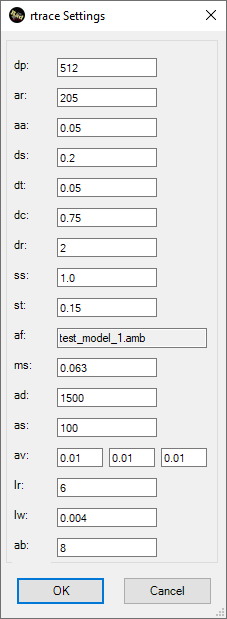
10-
After pressing the Continue button, the simple rtrace Settings
page will pops-up on the screen.
In this
page, you can either confirm or modify the rtrace parameters that are used when
measuring a daylight metric on any points in Radiance.
Between all
these parameters the ab that shows the number of ambient bounces is the
most important one.
However, the
combination of ambient accuracy (aa) and ambient resolution (ar)
with the maximum scene dimension provides a measure of how fine the luminance distribution
in a scene is calculated. Therefore, these two parameters are also very
important.
After
finishing to change or confirm all the parameter values that are shown on this
page, press the OK button to continue.
11-
After pressing the OK button in the simple rtrace Settings
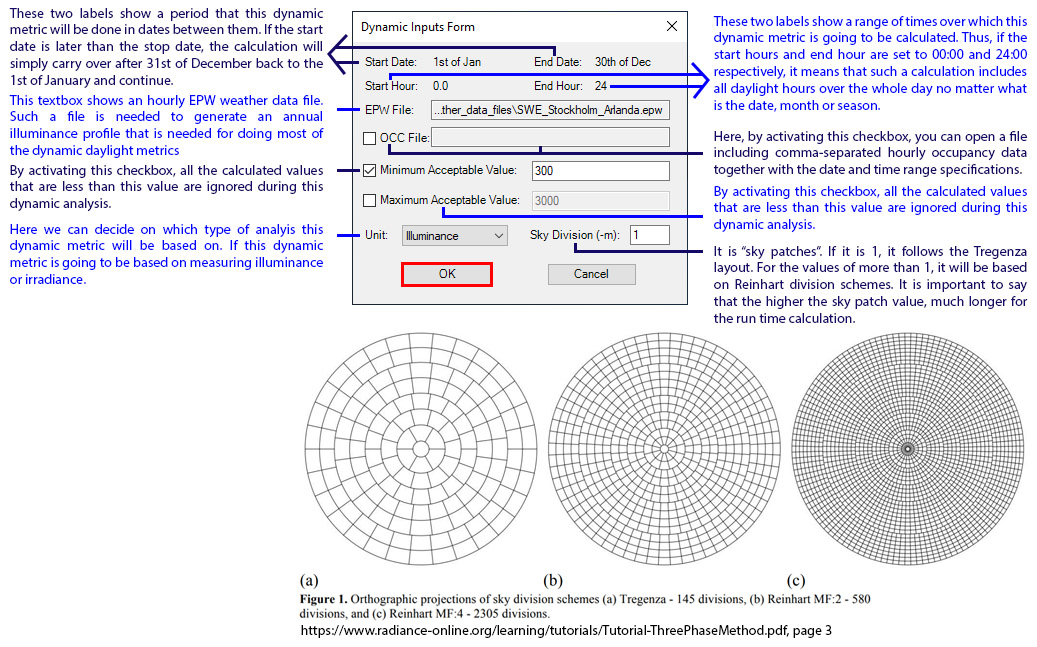
page, a new page that is named Dynamic Inputs Form comes on the screen.
This page
includes all the parameters that can help us to check fulfilling daylight access
for each point in the scene against the minimum and maximum acceptable light
level requirements that are specified here for each hour during the selected
period.
In this
page, in addition to showing the selected daily and yearly period, and the
imported weather data file, it has other options like adding occupancy file to
define more precisely the working hours during a year, and Minimum and Maximum
acceptable values.
In this
page, we can also define if we want to do the illuminance or irradiance based analysis.
Here also we define the Sky Division that is needed by rcontrib to do
such dynamic analysis.
The higher the
Sky Division number, the more accurate results, but much longer
calculation time.
12-
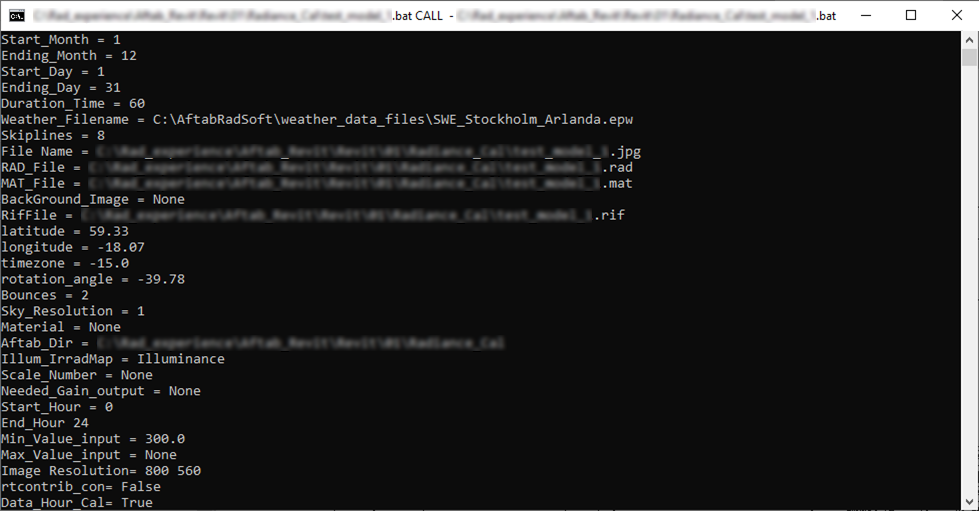
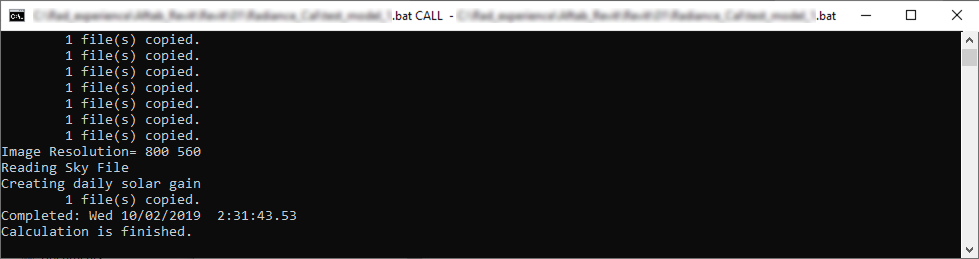
After pressing the OK button on the simple rtrace Settings page,
the calculation process will start. Here it is worth to mention that, this is a
quite time-consuming calculation and it could take a few hours, about a day or
even more depending on the complexity of the model, the image
resolution and the Sky Division parameter. Therefore, to do such
analysis, you need to be patient
.
.
.

.
.
.
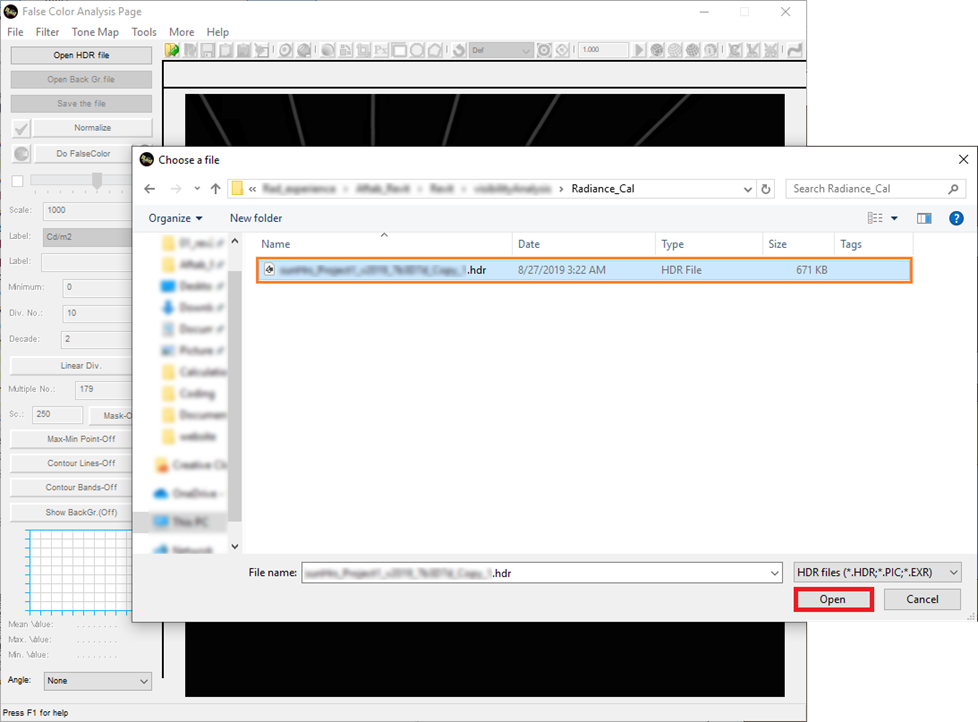
13-
Now, it is time to make the image-based analysis. Therefore, the next step
is to press the OpenAftabFC Button.

14-
When the FalseColor Analysis page is opened, it automatically opens
the File Opening page.
Therefore,
here we need to open an HDR file that, in this case, should be the one that is
created when the view based Dynamic Daylight Metric (it is Daylight
Autonomy if we only specify the Minimum Daylight Requirement in the Dynamic
Inputs Form) calculation is finished.
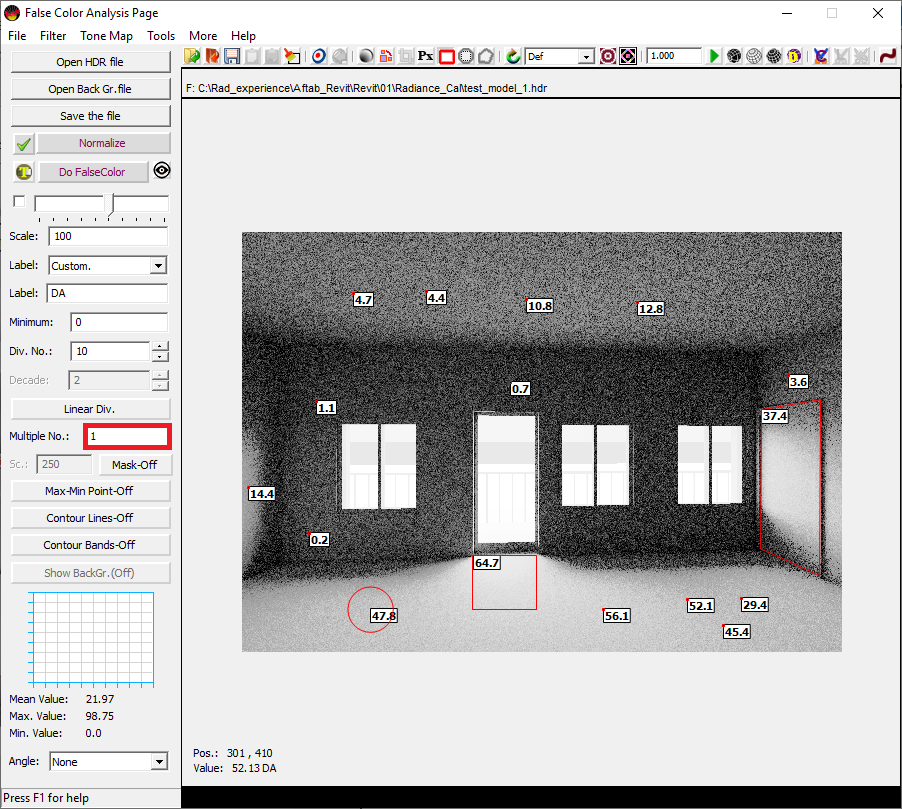
- In the FalseColor Analysis Page, we can measure the
values of each point by clicking on the image, or find the average of an
area by drawing a rectangle or circle.
In this DA based
Analysis, the Multiple No. (Multiplying Number) should be 1.
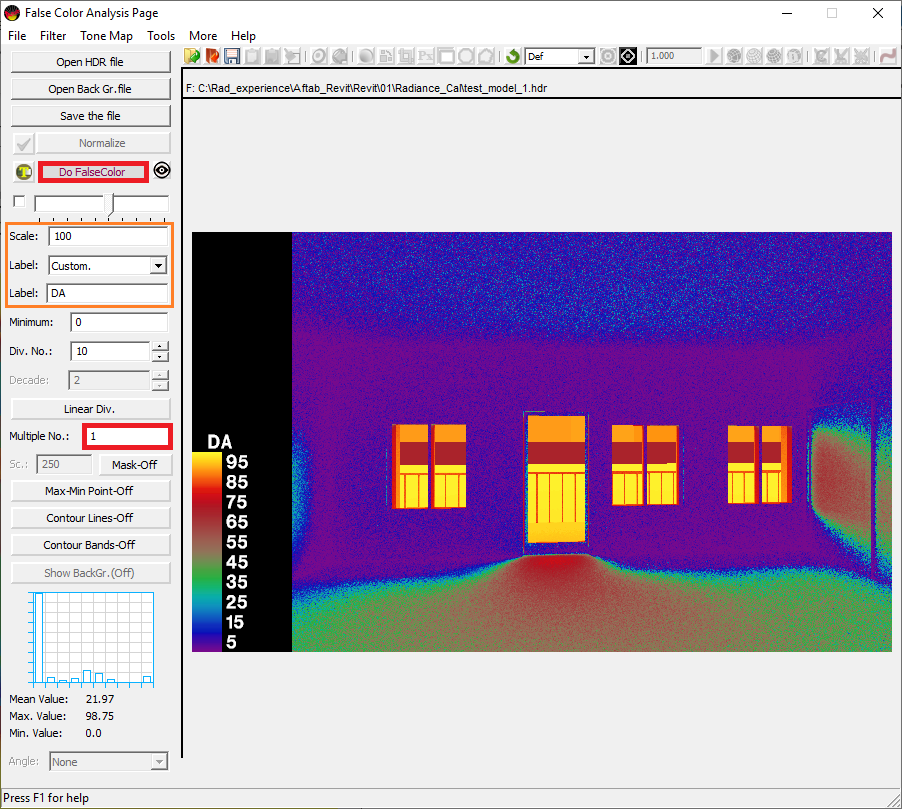
15-
Moreover, on this page, we can make falsecolor images too.
For example,
by changing the Scale value to 100 as a maximum value, and
choosing Custom. Under the Label drop-down list, and writing DA
as the Label, by pressing the Do FalseColor button, we can create
a falsecolor image.
To know more about different functions of FalseColor
Analysis Page, you can take a look at this pdf file or
this link.