AftabRad
Revit Add-in -> Export To Radiance -> Type of Sky/Analysis: Dynamic
Metrics by Daysim 3.1
This tutorial shows how to calculate different types of Dynamic Daylight Metrics like Daylight Autonomy for selected calculation surface grids. This part of add-in helps Revit to communicate with Daysim 3.1. Thus, here, it exports the model, materials and calculation surface grids to Daysim 3.1 instead of exporting them to Radiance.
Moreover, since Daysim is a software that can do different types of Dynamic Daylight Analysis, such analyses are usually based on the climate of the place. Therefore, to calculate such metrics, we need to import the weather data file of the place too.
Anyway, as an example to do a Daylight Autonomy analysis for some of the rooms in the model, we should do the following steps.
1- Press calculationPointCreation button in the AftabRad Add-in

2- Select Dynamic Metrics by Daysim3.1 in the Type of Sky/Analysis

3- In the Calculation Point Creation page, we need to create calculation grids points by selecting some surfaces in the model, some elements together with choosing some of their surface normal directions,
or by choosing some of the rooms/spaces inside the building to do the analysis.
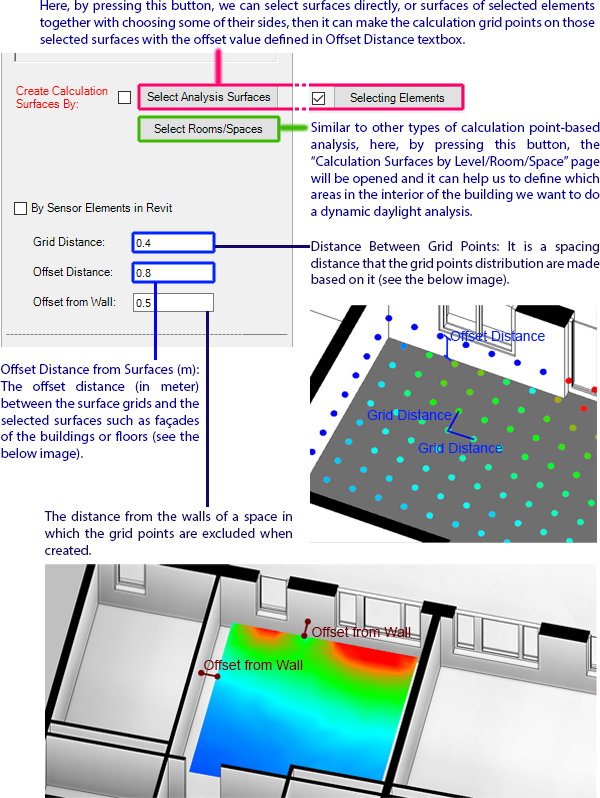
I. Since Daysim can import and calculate on only one calculation points file at once, we can create a calculation point file by using sensor grids points family instead.
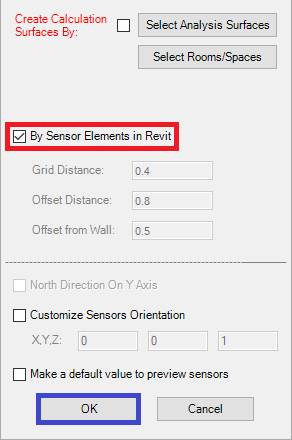
II. Now, we need to press the OK button in the Calculation Point Creation page.
4- Then we need to press ExportToRadiance button in the AftabRad Add-in

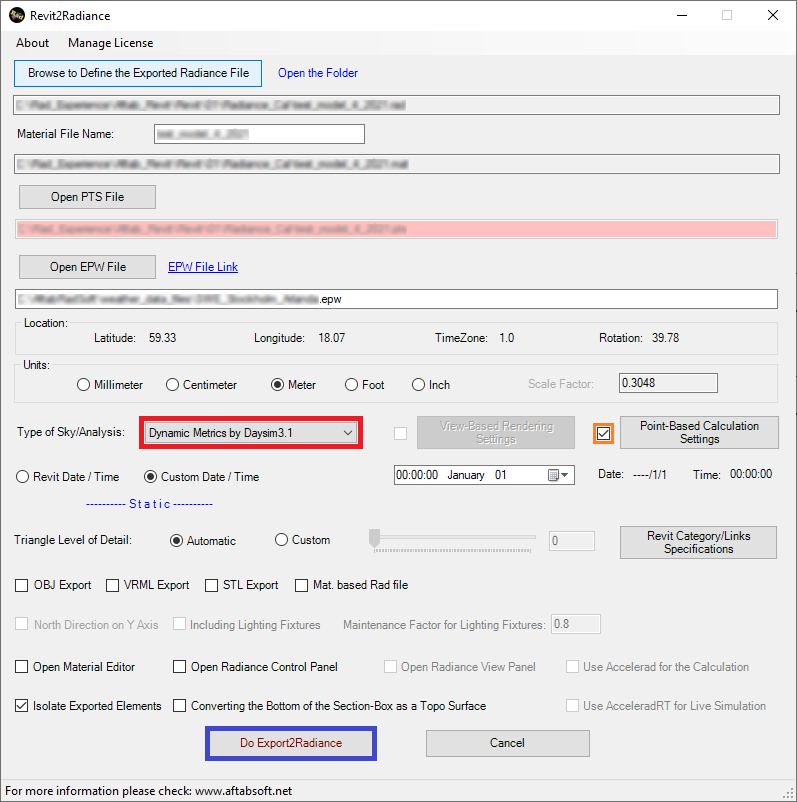
5- Check if the Dynamic Metrics by Daysim3. 1is chosen under the Type of Sky/Analysis. If not, please choose Dynamic Metrics by Daysim3.as the Type of Sky/Analysis.

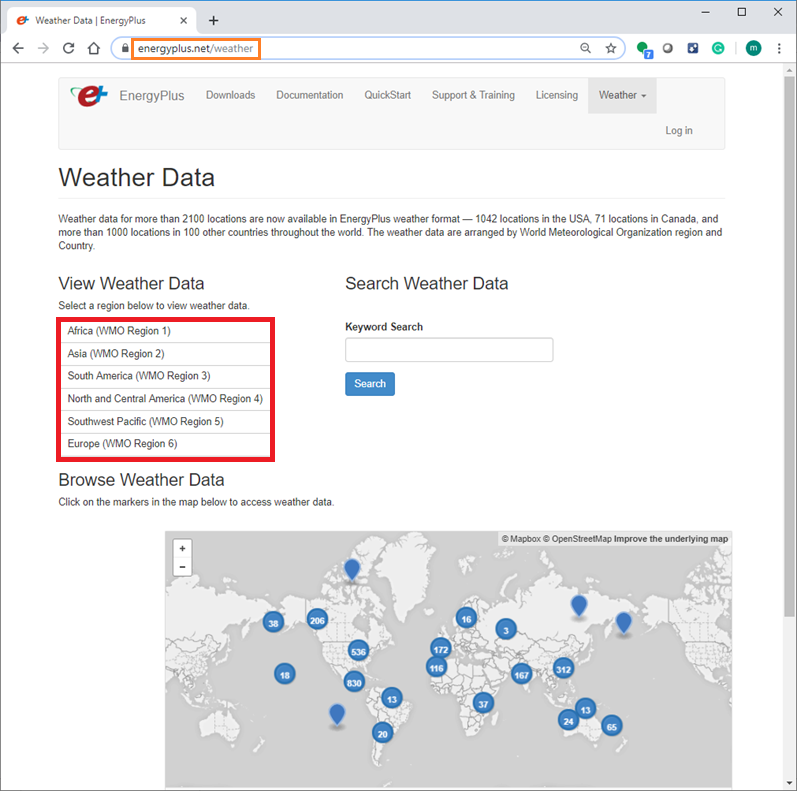
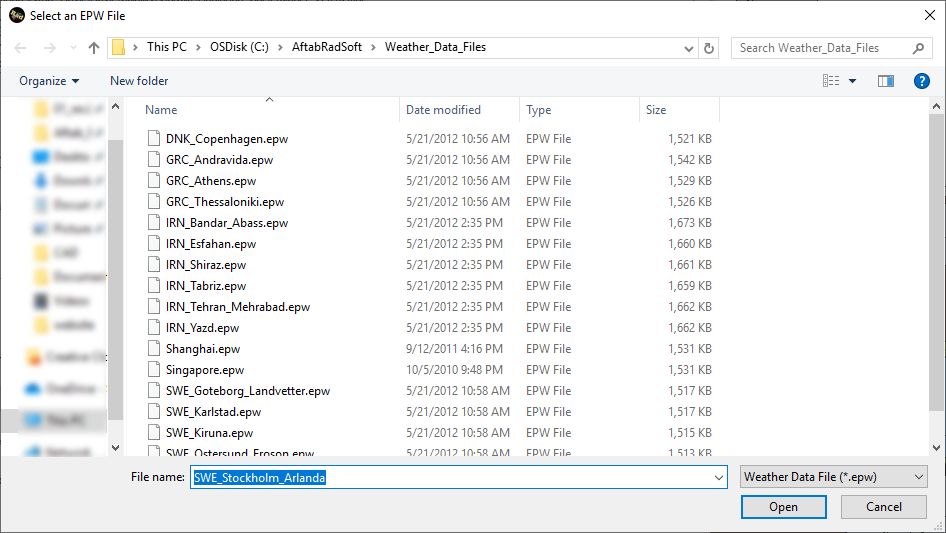
6- Since dynamic analyses are usually based on including typical weather conditions of the place, we need to import EPW (Energy Plus Weather Data File).
One of the most common way to find different EPW file for different cities in the world is to download the weather data file of around 2000 cities in the world from https://energyplus.net/weather website.
The other free option to find an appropriate EPW file for your project is to use this link: http://climate.onebuilding.org/
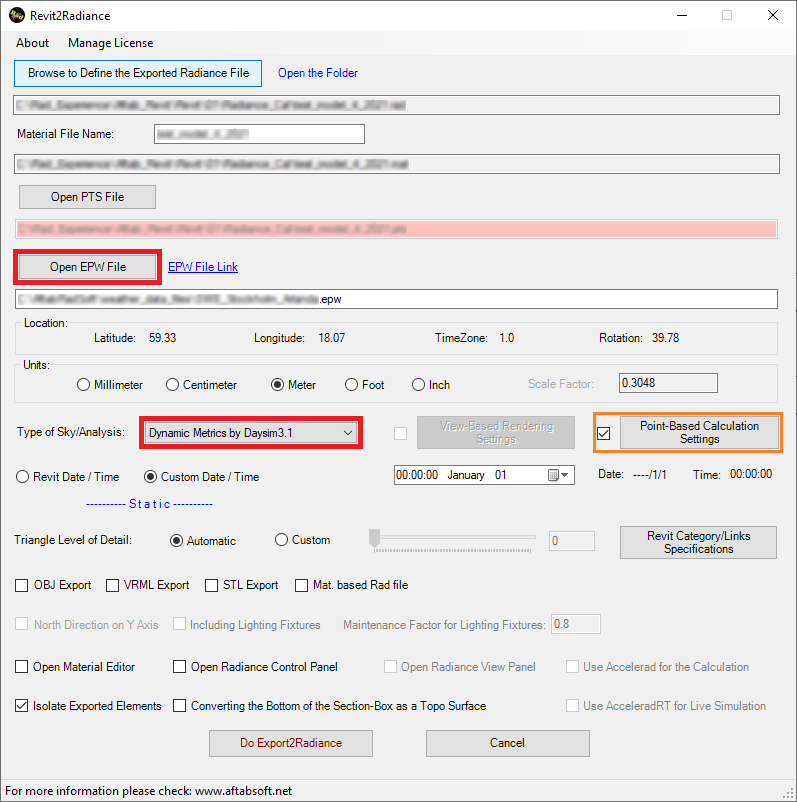
7- Press Open EPW File button and import an EPW file that is relevant for the location of your model.
8-
Check the checkbox next to the Rtrace Settings button, and press
the Do Export2Radiance button.
9-
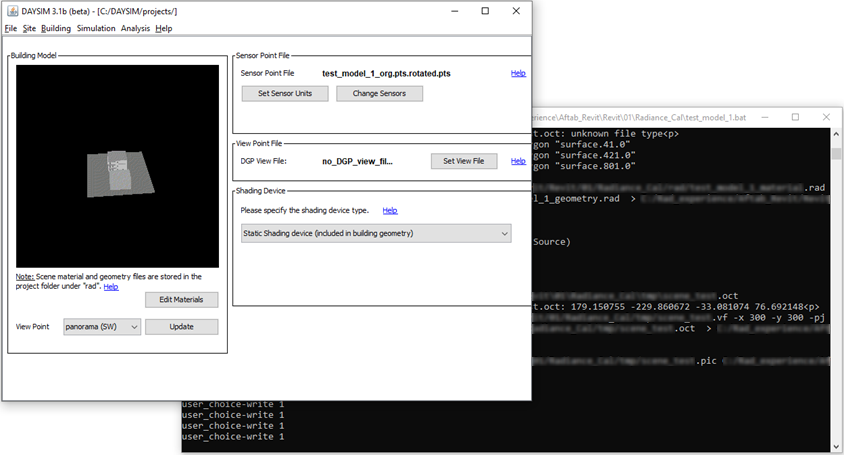
Then, you need to wait until the Daysim 3.1 interface is opened.
10-
To find a good tutorial for the Daysim 3.1, you can either check User
Guide under its official website,
this link,
or check the GettingStarted.pdf that is saved under the lib
folder in the main Daysim directory (for example
C:\DAYSIM\lib\GettingStarted.pdf). Moreover, you can check my presentation
for the KTH students in 2014.
Anyway, as
an example you can follow the below steps to do a Daylight Autonomy calculation
for the exported calculation surface grid point in Daysim 3.1:
i.
In the Daysim 3.1 interface, under the Building tab page, AftabRad
add-in automatically sets the Senor Point File.
We can add manually a ViewPoint File,
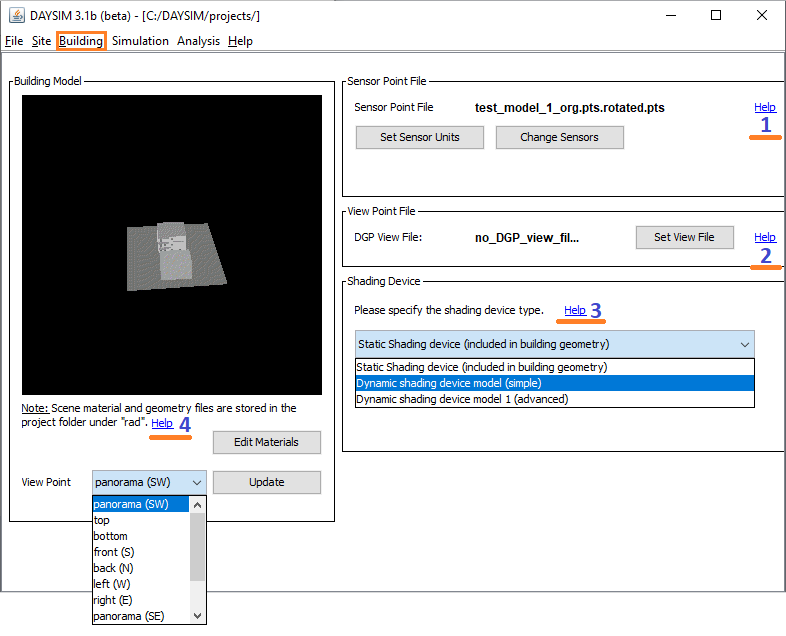
if we want to do a DGP annual analysis. Then we can define Shading
Device Type under the Shading Device panel.
To know more about this page, there are
four bluish Help buttons, but as their links
do not work anymore, you can check the below links that are corresponding to
each of those Help buttons. Therefore, the
following links that are related to 1 to 4 numbers that are placed next to
those Help buttons are as below:
1-
http://daysim.ning.com/page/keyword-sensor-file
2-
http://daysim.ning.com/page/daysim-file-type-viewpoint-file
3-
http://daysim.ning.com/page/keyword-shading
4-
http://daysim.ning.com/page/keyword-material-file
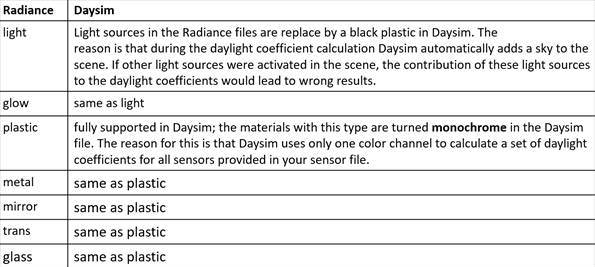
Regarding Materials in
Revit:
Daysim only supports a fraction of all
Radiance materials. Should your Radiance scene contain an unsupported material,
your simulation will generate an error. The following Radiance material
modifiers are currently supported in Daysim:
ii.
The second step is to go to the Simulation Page.
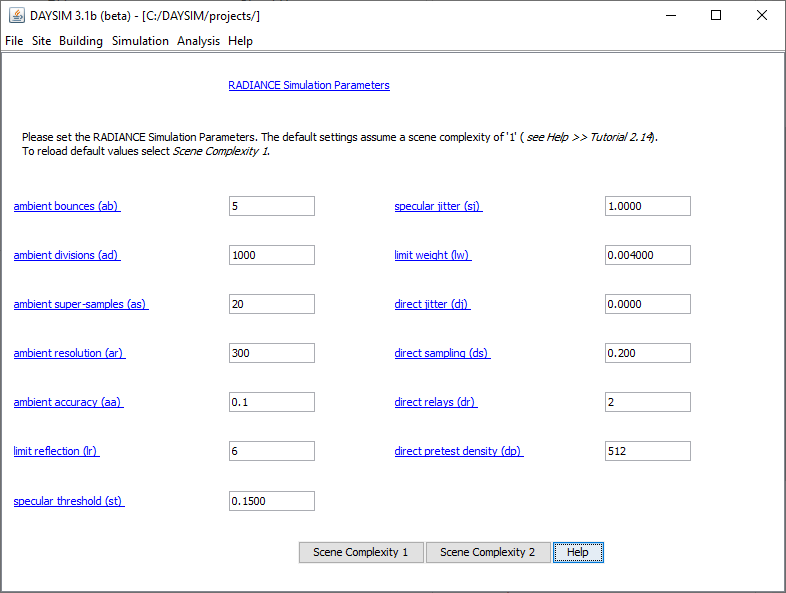
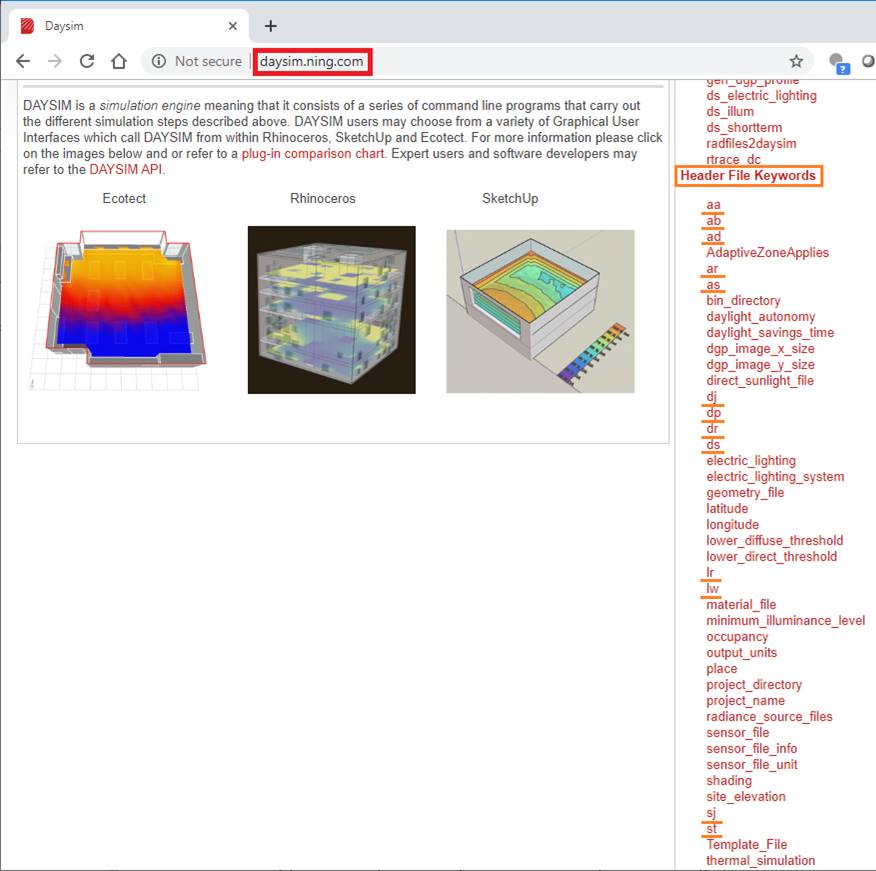
To find the definition
for each of the above parameters that are used in Daysim, you can check the Daysim website, under its User Guide
-> Header File Keyword
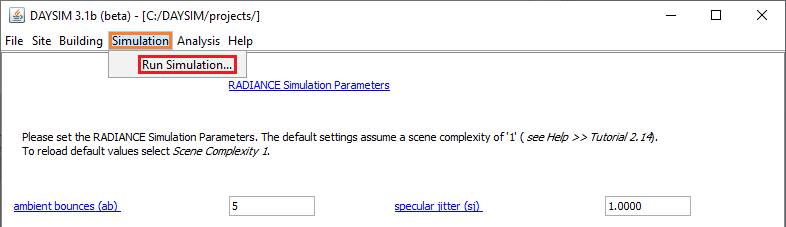
iii.
The third step is to press the Simulation button and then press Run
Simulation...
Then in the Run
Simulation part, activate the below highlighted checkboxes.
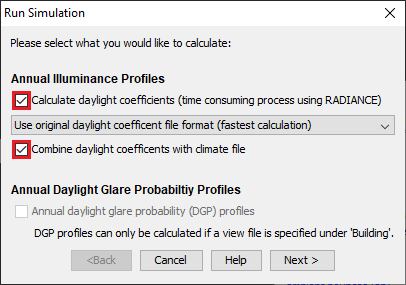
Then decide on one of
these three options for the type of calculation
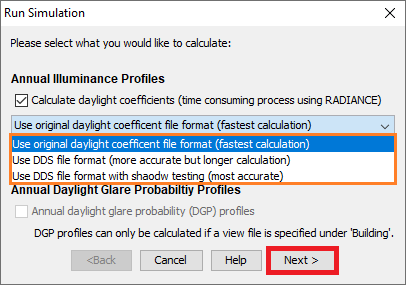
Regarding these three
types, here is an explanation for each of them.
1-
The first one that is Use original daylight coefficient file
format is the fastest calculation. It is based on the
original daylight coefficient and includes:
a.
145 diffuse daylight coefficients according to Tregenza division of the
celestial hemisphere.
b. 3 ground daylight coefficients.
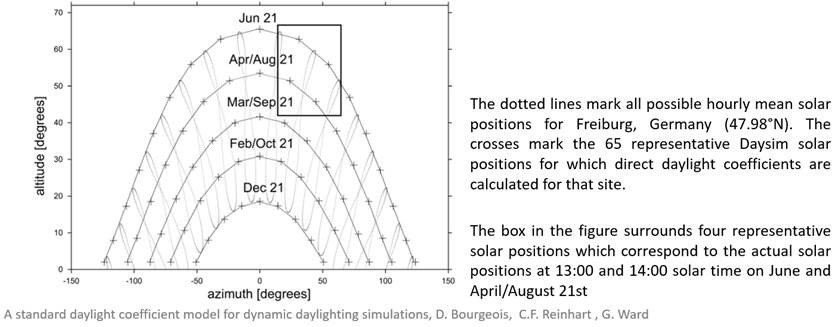
c.
65 direct daylight coefficients; this number may vary depending on the
latitude of the investigated building.
2-
The second one that is Use DDS file format is more
accurate than the first one, but has a longer calculation. It is based on
the original daylight coefficient and includes:
a.
145 diffuse daylight coefficients according to Tregenza division of the
celestial hemisphere.
b.
1 ground daylight coefficient
c.
145 direct-indirect daylight coefficients
d.
2305 direct-direct daylight coefficients
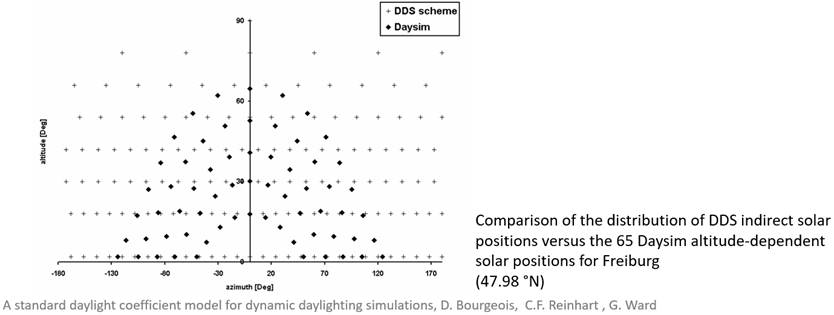
3-
The third one that is Use DDS file format with shadow testing is the most
accurate one, but has the longest calculation too. it includes:
a.
145 diffuse daylight coefficients according to Tregenza division of the
celestial hemisphere.
b.
1 ground daylight coefficient
c.
145 direct-indirect daylight coefficients
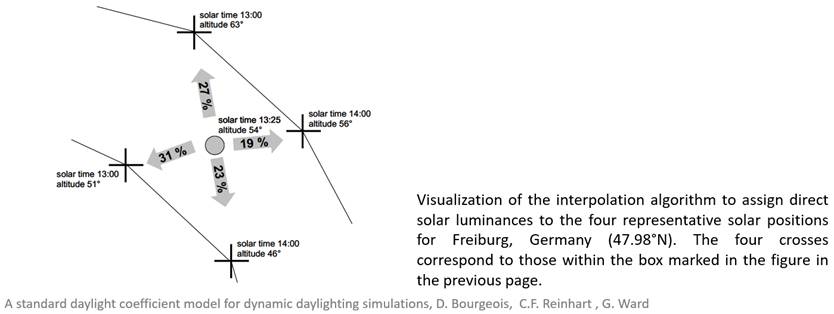
d.
Instead of relying on the 2305 direct-direct sun
positions the all actual direct sun positions that are taken from the climate
file are used in order to further reduce interpolation errors.
Now, in the Run
Simulation part, after activating the needed checkboxes and choosing the
type of calculation method, we can press Next and go to the second page in Run
Simulation.
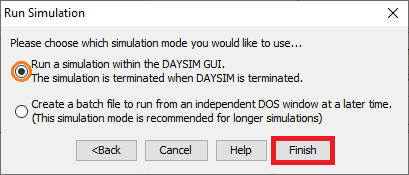
iv.
Here we can choose which simulation mode we would like to use. Then press
the Finish button.
If we choose the Run
a simulation within the DAYSIM GUI, then it starts to calculate and
the below pages will pop up on the screen.
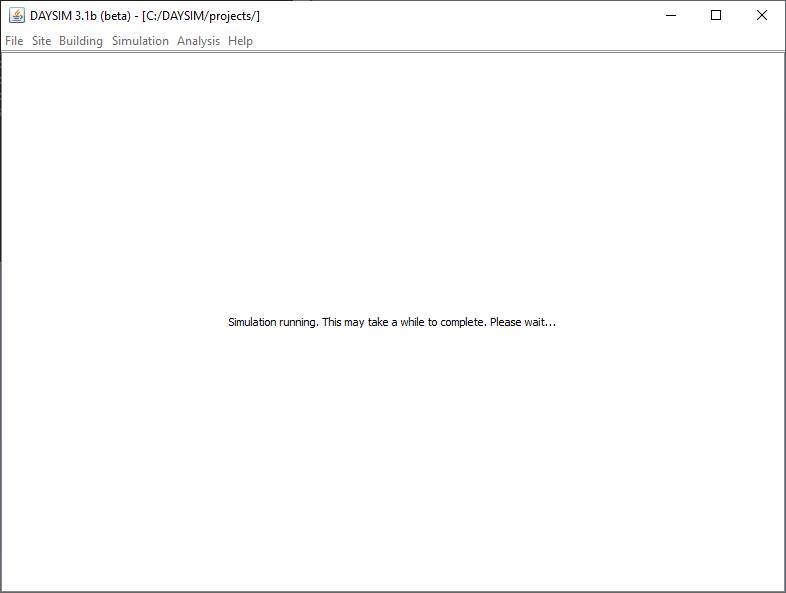
When it is finished,
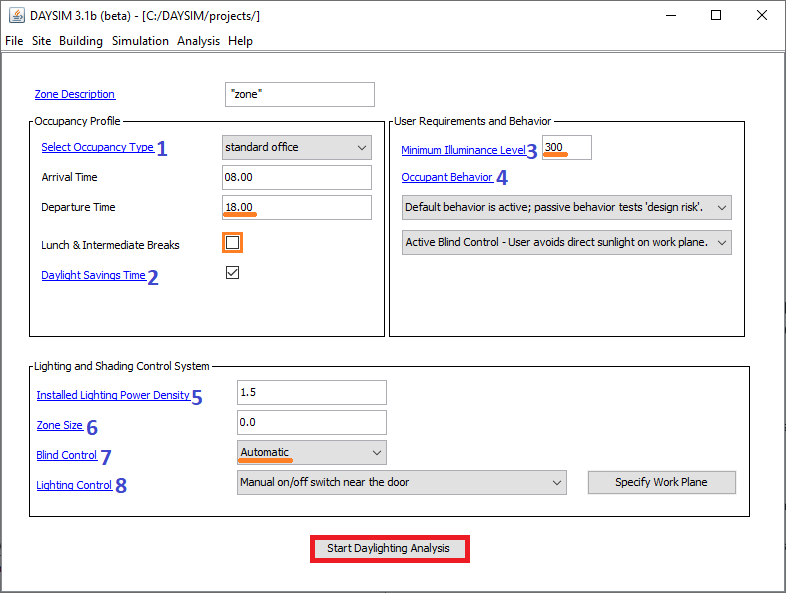
Same as other pages in this program, all
the bluish label links do not work, so to know more about this page you
can check the below links that are corresponding to each of those bluish label links.
Therefore, the following links that are related to 1 to 8 numbers that are
placed next to those labels are as below:
1- http://daysim.ning.com/page/daysim-header-file-deyword-occupancy-model
http://daysim.ning.com/page/keyword-occupancy-profile
2- http://daysim.ning.com/page/keyword-daylight-savings-time
3- http://daysim.ning.com/page/keyword-minimum-illuminance-level
4- http://daysim.ning.com/page/keyword-use-behavior
5- http://daysim.ning.com/page/keyword-installed-electric-lighting-power
6- http://daysim.ning.com/page/keyword-zone-area
7- http://daysim.ning.com/page/keyword-blind-control
8- http://daysim.ning.com/page/keyword-lighting-control
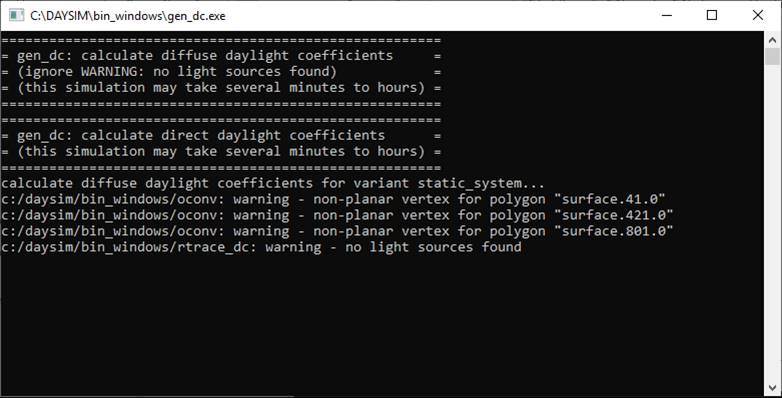
After adjusting all the
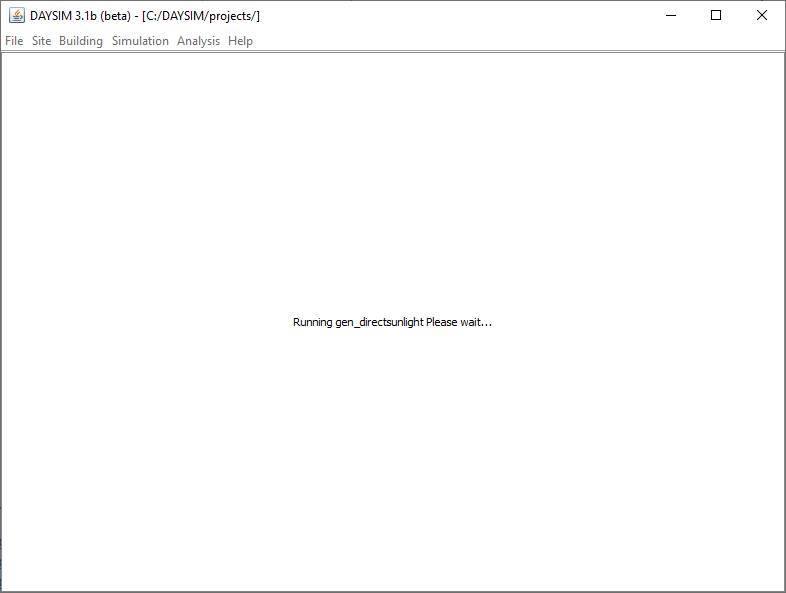
settings on this page, then it is time to press the Start Daylighting
Analysis button. After that, the below image will be shown on the screen:
When all the calculations
are finished, the below html page will be opened automatically.
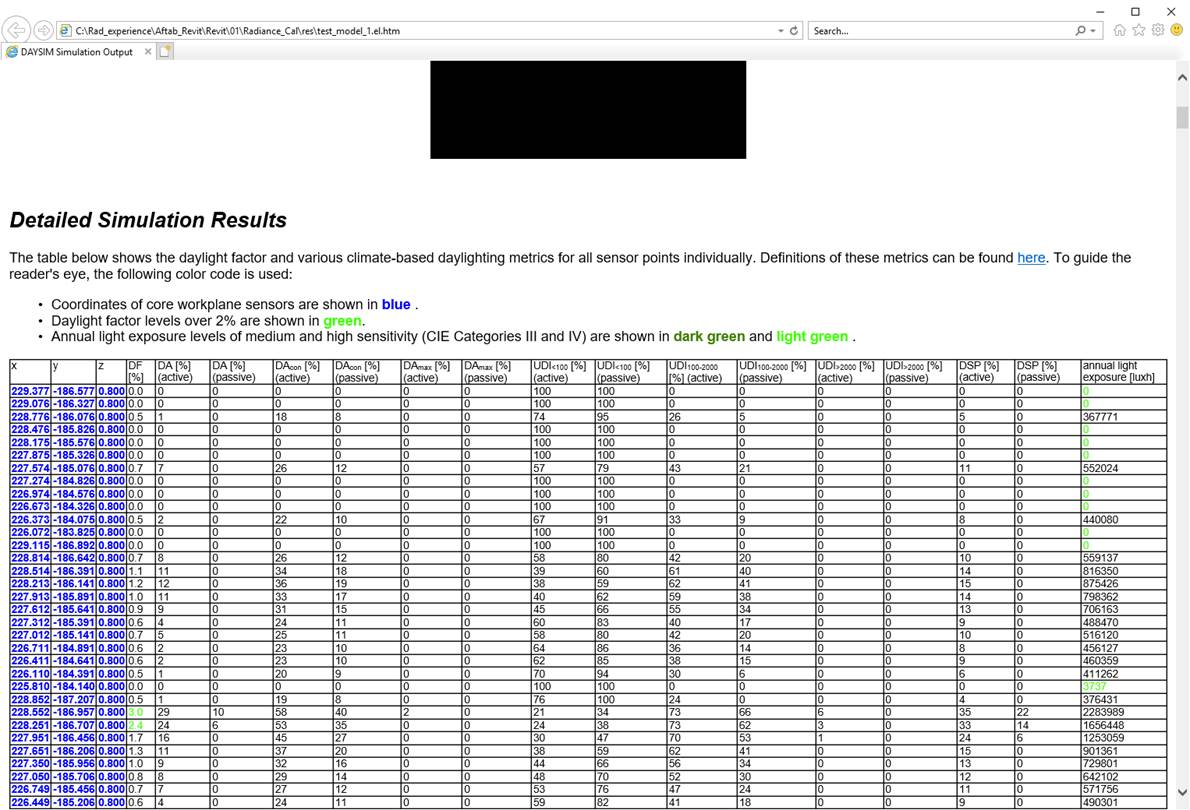
When such a page is
opened, Daysim finished its calculation.
11-
Now, it is time to import the calculation data into Revit. Therefore, the
next step is to press the importToRevit Button.

10
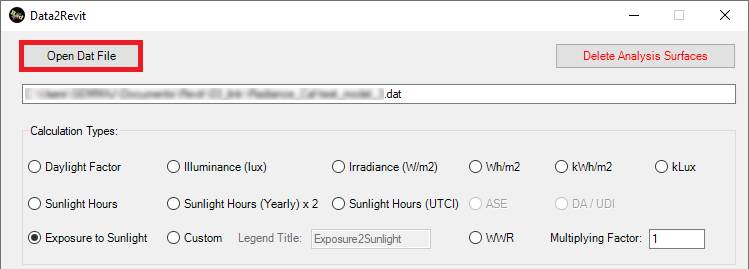
In the Data2Revit page, the Import button should be
disabled. It is because the calculation files do not save in the same folder as
the other Radiance files saved.
Therefore, we
need to press the Open Dat File button to open the right *.DA files.
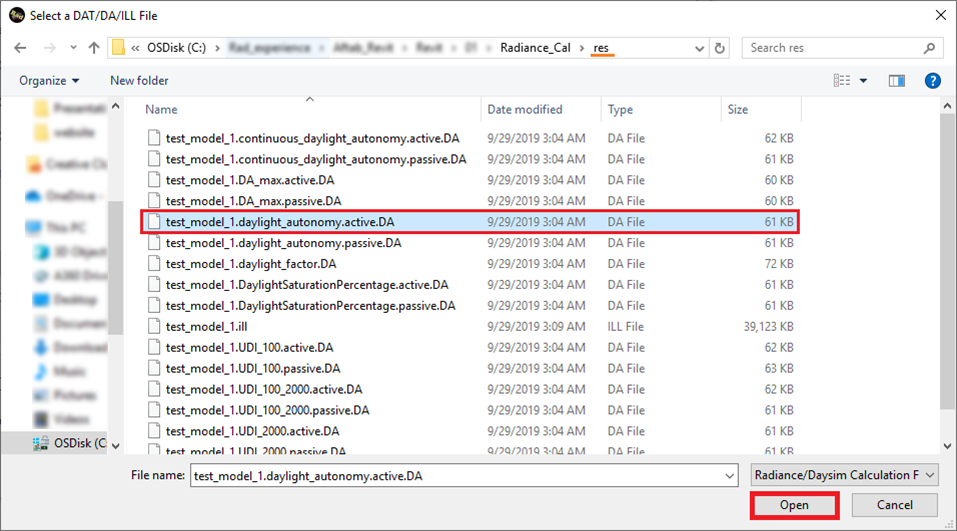
11-
When pressing the Open Dat File button, the below page will be
opened. Then we need to go where the *.DA files saved.
Usually you
need to go to the res subdirectory under the same folder as the Radiance
file and open the right DA file.
When choosing
the right DA file, press the Open button.
11-
Select the DA/UDI under the Calculation Type and then press
the Import button.
